2. Sites


The Sites screen is a bird’s eye view of all sites in your Hub, including those you have created on WPMU DEV dedicated and unlimited hosting platforms, as well as all of your connected 3rd-party sites.
If you haven’t set up your WPMU DEV account yet, visit The Hub page, where you can explore the features and see pricing packages.
Already a member? Visit your Hub dashboard to get started.
2.1 Getting Started
Copy chapter anchor to clipboardThe Sites screen is the default location where you’ll land every time you login to The Hub. You can access it anytime once logged in by clicking either The Hub logo or the Sites item at the top of the main menu.

The default Grid view lists all of your websites with a thumbnail of the home page for quickly visualizing all of your sites and sites that have actions waiting to be implemented.
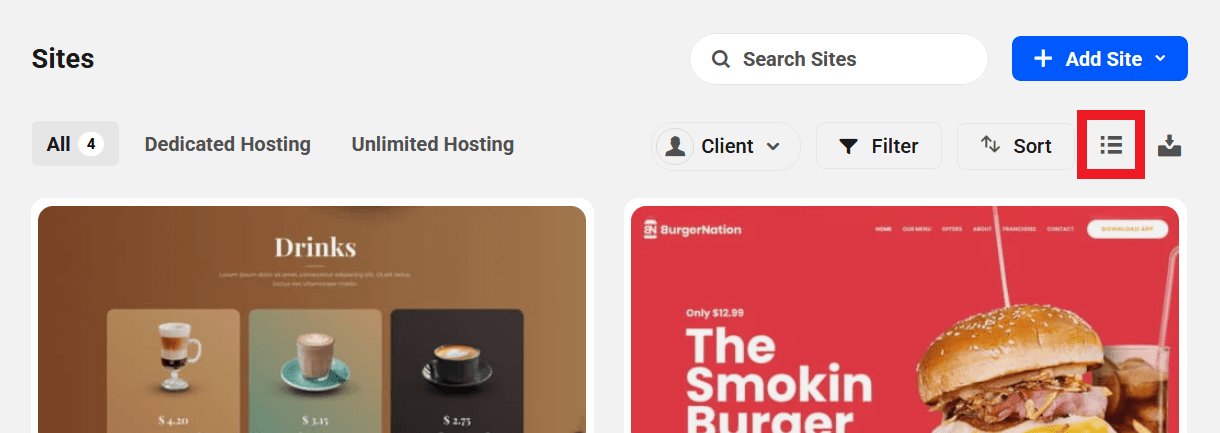
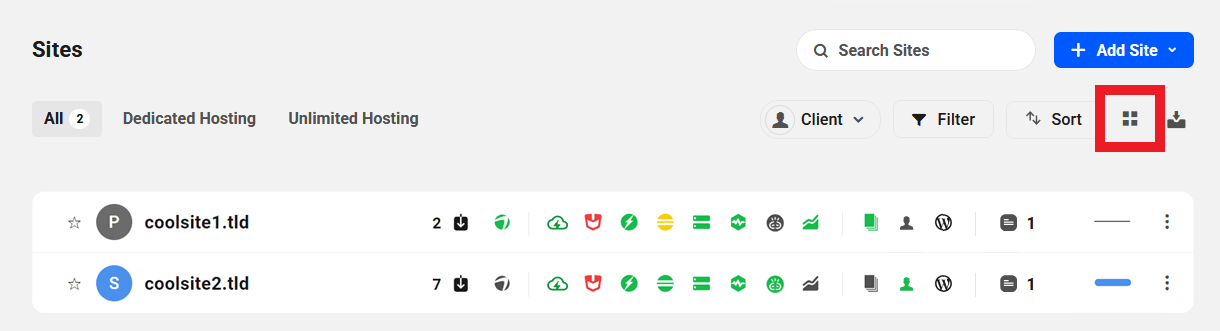
You can switch to a List view if you prefer by clicking the toggle at the far right of the menu. See the Grid and List View chapter below for more info.
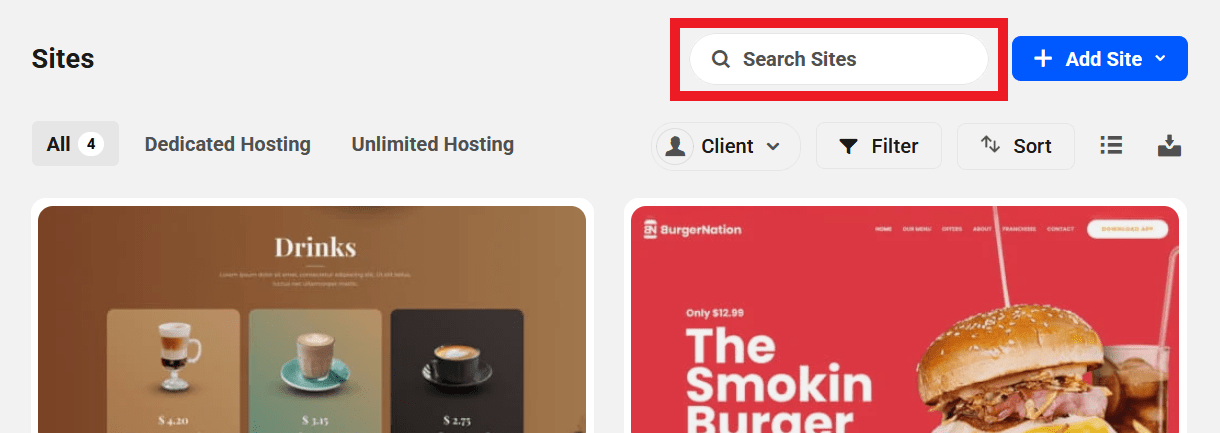
Use the Search field at top-right to quickly locate any site. Just start typing and your Hub will refresh automatically to show the results that match your search.
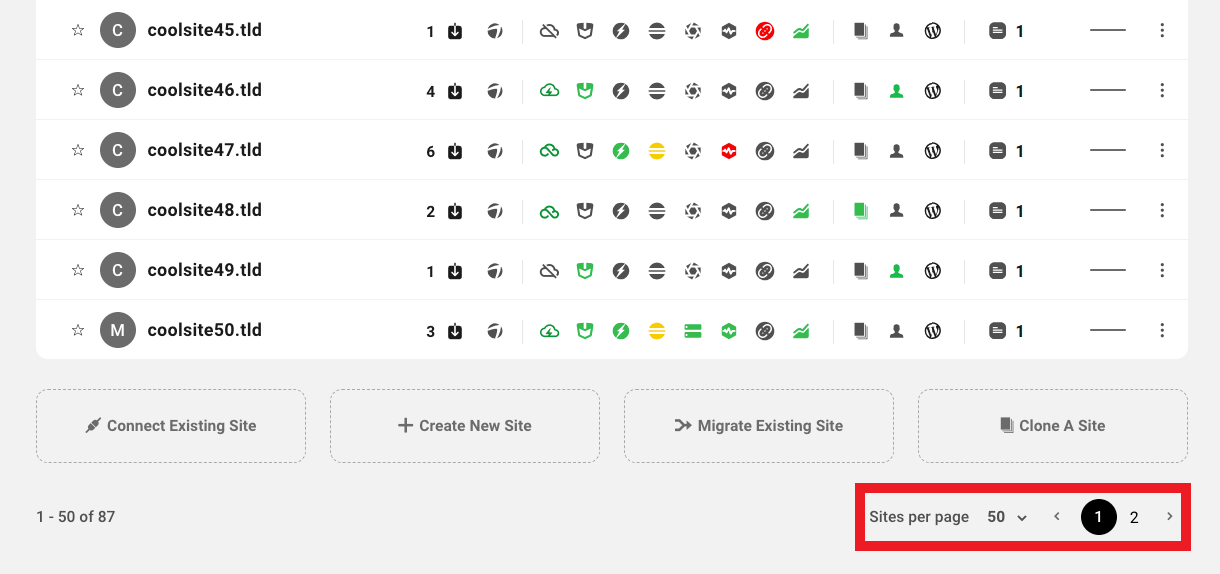
If you have more than 50 sites connected to the Hub, the pagination feature will kick in at the bottom of the page. You can select how many sites should display per page (15, 25, 50, 75 or 100), and use the page numbers or left & right arrows to navigate between your site pages.
By default, The Hub displays all of your dedicated and unlimited hosting sites (including staging sites) under the All tab. You can filter and sort the display of sites in your Hub in multiple ways.
Click either the Dedicated Hosting or Unlimited Hosting tabs to view only sites hosted on those platforms.
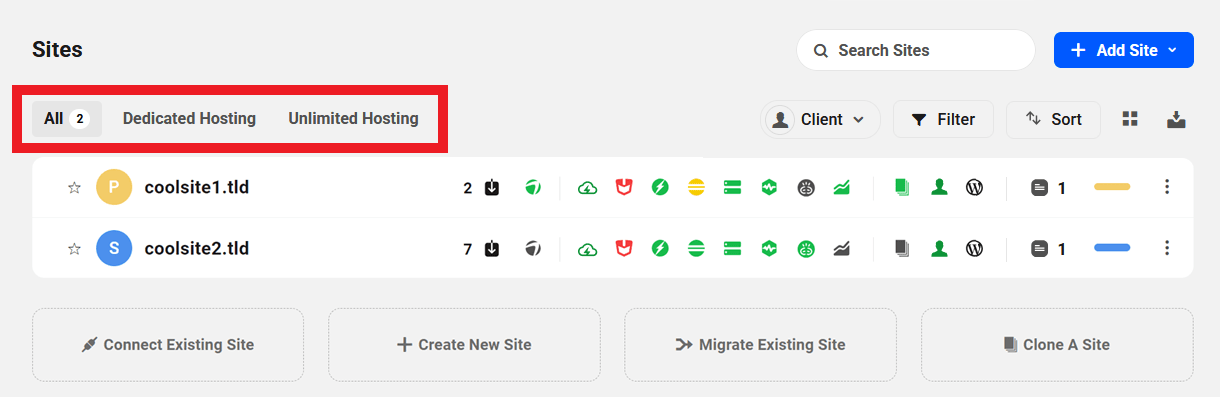
Use the Client filter to display only sites linked to a selected client.

Click the Filters button to display only sites that match your selected criteria. See the Filters chapter below for details on the options available.

Use the Sort filter at top-right to display sites in ascending or descending alphabetical order or by the date when the site was connected to the Hub.

- Recently added – This puts the sites in order of when it was added to the Hub with the most recently added sites at the top.
- A-Z – List your sites domain names in alphabetical order.
- Z-A – Puts your sites in reverse alphabetical order.
- Pin favorites to top – See the Favoriting a Website chapter below for more on this feature.
2.2 Add a Site to The Hub
Copy chapter anchor to clipboardThere are two ways to connect your site to the Hub:
- Automatically from the Hub
- Remotely with the WPMU DEV Dashboard plugin
In this chapter, we will cover how to connect a site to the Hub using both methods.
It’s important to note that you cannot connect subsites in a multisite install to the Hub; only the main site of a multisite can be connected.
If you add a site with a non-standard port specified in its domain name, it will be added as a unique site in your Hub. This can be useful for development sites for example, where you could have domain.com as well as domain.com:8001, domain.com:8002, domain.com:8003, etc.
However, if they are all the same WordPress install and you don’t want all of them to appear in your Hub, you can add the following constants to your wp-config.php file to force the domain that should be used by your Hub and its API (the domain you specify must match the public URL of the site):
define( 'WPMUDEV_HUB_SITE_URL', 'https://domain.com' );
define( 'WPMUDEV_HUB_HOME_URL', 'https://domain.com' );
2.2.1 Connect from The Hub
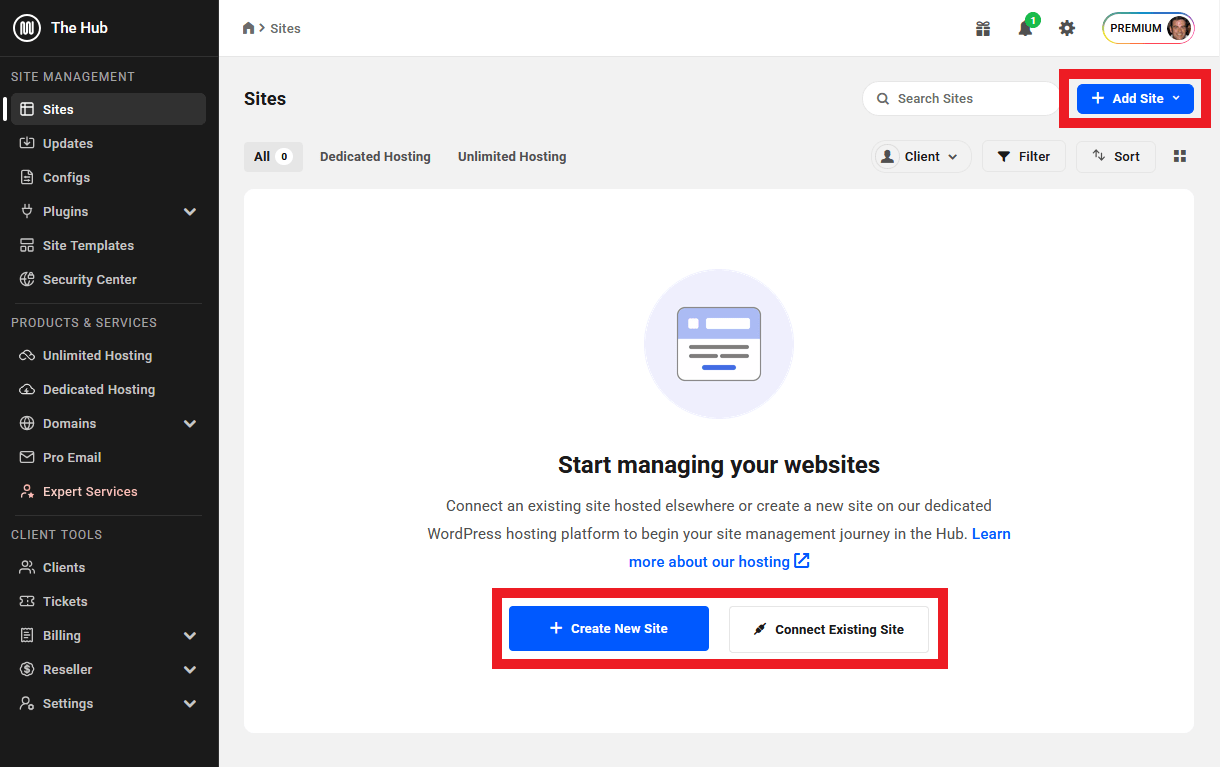
Link to chapter 2If you’ve never connected a site to the Hub, you’ll be given a prompt to Start Managing Your Websites when visiting the Hub dashboard. Click the + Add Site button at top-right, or the Connect Existing Site button in the middle of the screen to get started. Alternatively, click + Create New Site if you wish to create a site hosted by us.
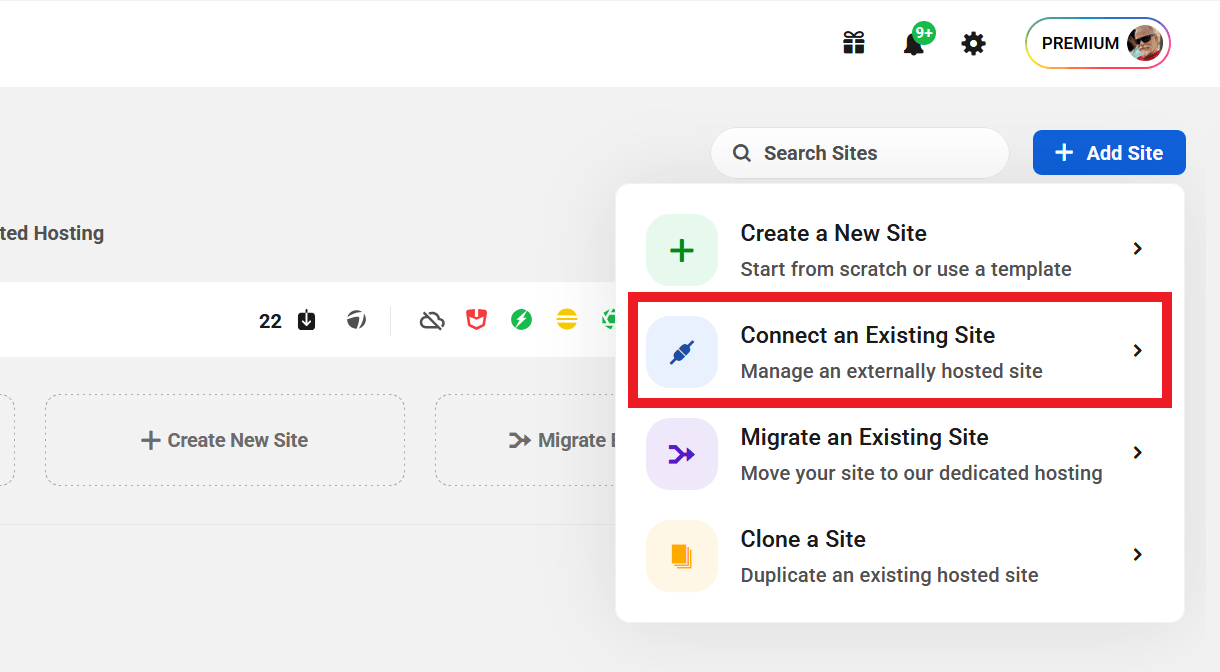
When you click the + Add Site button, you’ll be prompted to select the connection option that best suits your current needs.
- Create New – Create a brand new site hosted with us. See Creating a New Site for more.
- Connect – Connect an externally hosted site to The Hub.
- Migrate – Move your site to a dedicated environment hosted by us. For more on migrating a site, see our Migrating an Existing Site doc.
- Clone – Create an exact duplicate of a WPMU DEV hosted site. See Cloning a Site for more.
For the purposes of this guide, we’ll select the option to connect a 3rd-party-hosted site.
You’ll then be prompted to select either the Automatic or Manual Connection method. This is also where you’ll land if you click the Connect Existing Site button instead.
The manual method involves installing the WPMU DEV Dashboard plugin, as detailed in the following chapter of this document. Select the Automatic method to connect your site automatically to your Hub.

Enter the website URL of the WordPress site you would like to connect to the Hub into the Website URL field and click the forward arrow to continue.

You’ll then be prompted to enter your WordPress administrator username and password for the website you are connecting. Note that we don’t store your login information as it is only used to connect your site to the Hub.
You will also be given the option to enable Secure one-click WP Login, also known as Single Sign-On (SSO). SSO allows you to access connected sites securely from the Hub without having to sign in separately to each site. SSO is enabled by default, and can be disabled by de-selecting the checkbox. Learn more about SSO.
Click the Connect button to connect your site.

This will automatically install and connect the WPMU DEV Dashboard plugin to the Hub. The WPMU DEV dashboard is a lightweight utility plugin for easily connecting with the WPMU DEV API. Read more about available tools and features in the WPMU DEV Dashboard documentation.
Once your site is connected, you’ll be presented with the Quick Setup wizard where you can install, configure and activate the Hub services you need with just a few clicks.
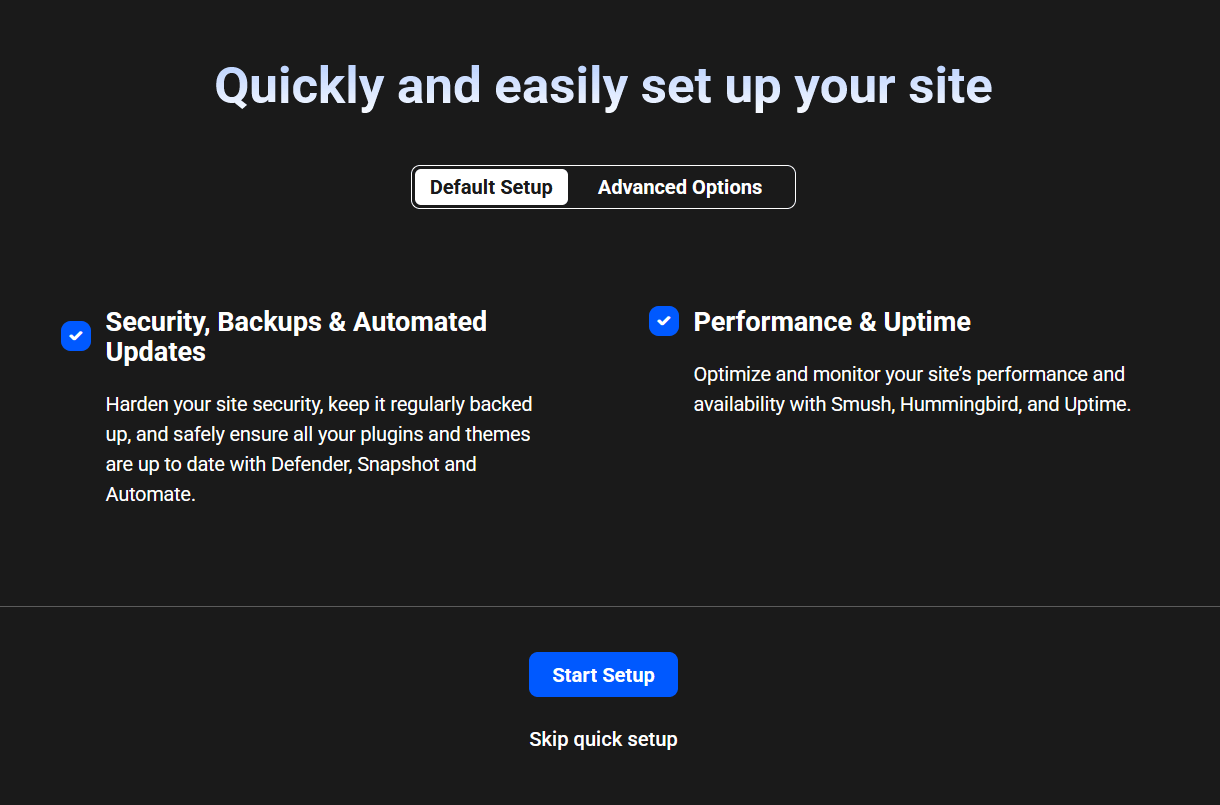
Click Skip quick setup at the bottom if you don’t want to set things up right away. You can always get the wizard back again later from your Site Settings if needed.
Your connected site will appear in your Hub overview screen where you can click the + Add Site button in the upper right-hand corner or any of the options at the bottom to add more sites as needed.

If you encounter any issues connecting a site remotely from the Hub, click the Use plugin method from the Connect WordPress website screen to manually download and install the WPMU DEV Dashboard plugin following the instructions below.
2.2.2 Connect from the WPMU DEV Dashboard Plugin
Link to chapter 2WPMU DEV hosted sites are automatically added to the Hub associated with the account that created the site. See Connecting WPMU DEV Hosted Sites below for more information on that.
If your site is not hosted with us, you can still connect remotely via the WPMU DEV Dashboard Plugin. Firstly, ensure that the plugin is installed and active on the site that you want to connect to The Hub.
When you navigate to the WPMU DEV Dashboard plugin tab, you will be prompted to enter your WPMU DEV account credentials to connect the site. Enter your credentials and tick the Enable SSO box if you would like to enable Single Sign-On, which allows you to access your site from the Hub without needing to log in each time. Click Connect when you’re ready.

Your site will then start connecting to the Hub. This is generally very fast but may take a few moments.

Once your site has finished connecting, you will receive a success message and can now use the WPMU DEV Dashboard plugin to its full extent.
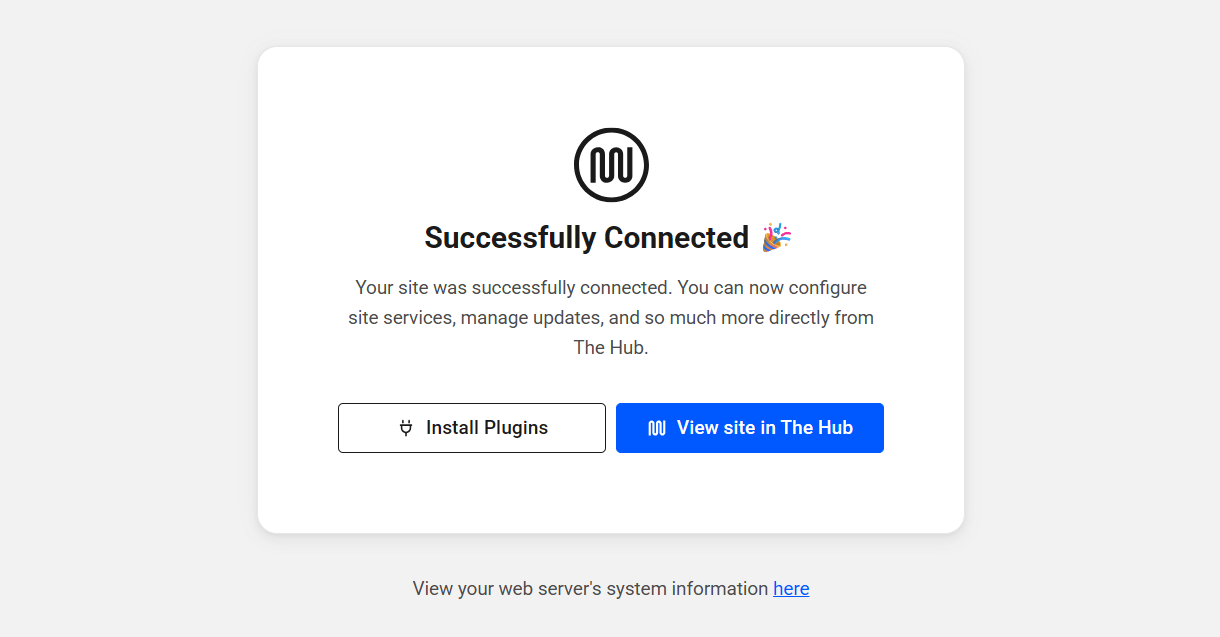
That’s all that’s needed to connect your site to the Hub and now when you revisit your Hub and refresh the page, the new site will appear under the My Sites tab.
2.2.3 Connecting WPMU DEV Hosted Sites
Link to chapter 2WPMU DEV hosted sites are automatically added to the Hub account associated with the WPMU DEV member who creates the site. Learn more about setting up a site with WPMU DEV hosting in the Getting Started guide in the WPMU DEV Hosting section.
Connecting a WPMU DEV Hosted Site to a Different Account
A WPMU DEV hosted site can only be connected to the Hub account of the member who created the site. Attempting to connect it to a different Hub account will fail due to the mismatch of the WPMU DEV API keys.
If you need a team member or client to have access to a WPMU DEV hosted site in your Hub, please use the Team or Client features. Both have roles and capabilities options that give you granular control over exactly what they can access in your Hub.
Moving a WPMU DEV Hosted Site to a Different Account
Changing site ownership is not directly possible in your Hub, or in the other account owner’s Hub.
It is a manual migration process that first requires consent and authorization from both the current and new account holders.
So if you do need to transfer ownership, and billing, of a WPMU DEV hosted site, please contact our support superheroes who will be happy to assist you.
2.3 Filters & Labels
Copy chapter anchor to clipboardThe filters and labels features enable you to selectively display sites based on several standard categories as well as any customized labels you may want to create.
See the Filters chapter below for details on the available filters. See the Labels chapter below for more information about creating customized labels to better organize your site list.
Note that if you have team members or clients accessing your Hub or client portal, any labels you set will be visible only to you, and any labels set up by a team member or client will be visible only to that user.
To access the features, click the Filter button above your site list.
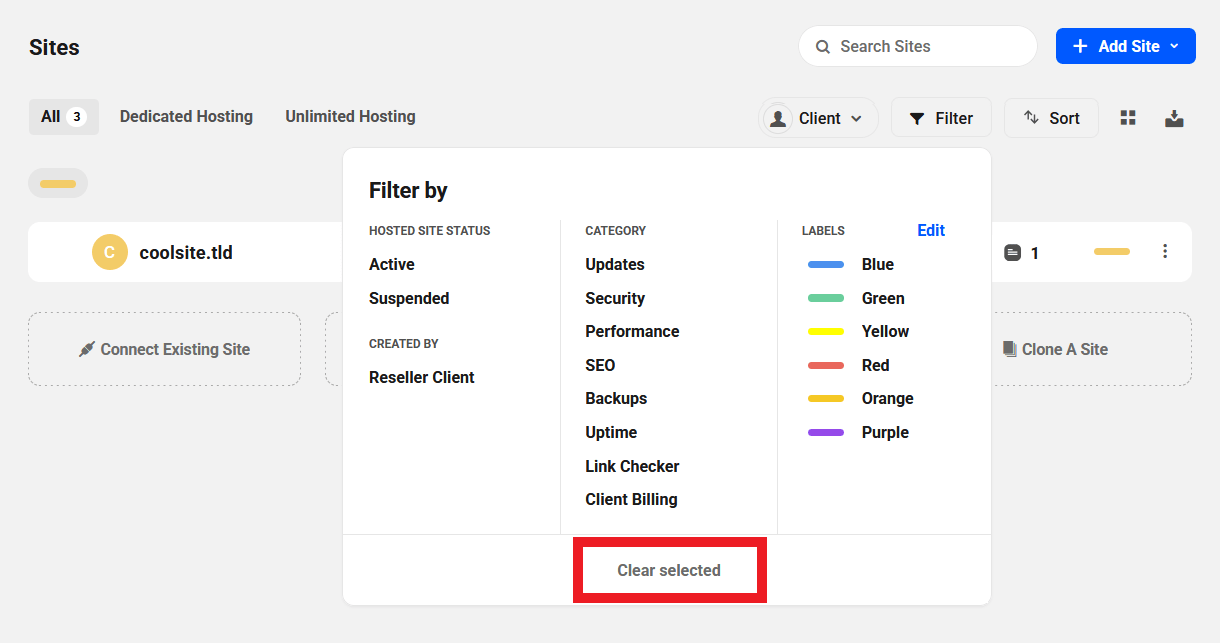
Click on a hosted site status or a category to view the sites relevant to that status or category, or click on a label to view sites that you have associated with that specific label. Filters and labels can be cleared by clicking on Clear selected.
If multiple categories and/or labels have been selected, you can click the CLEAR ALL button to remove the applied filters and labels.
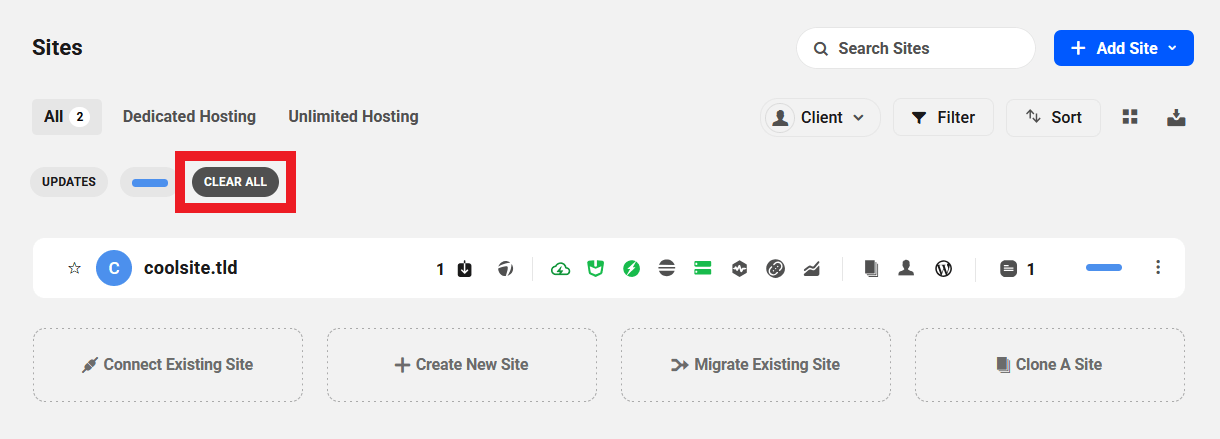
It is also possible to remove individual categories and labels by hovering over the specific filter and clicking on the x icon.

2.3.1 Filters
Link to chapter 3The filters feature allows you to hone in on a specific group of sites that need attention.
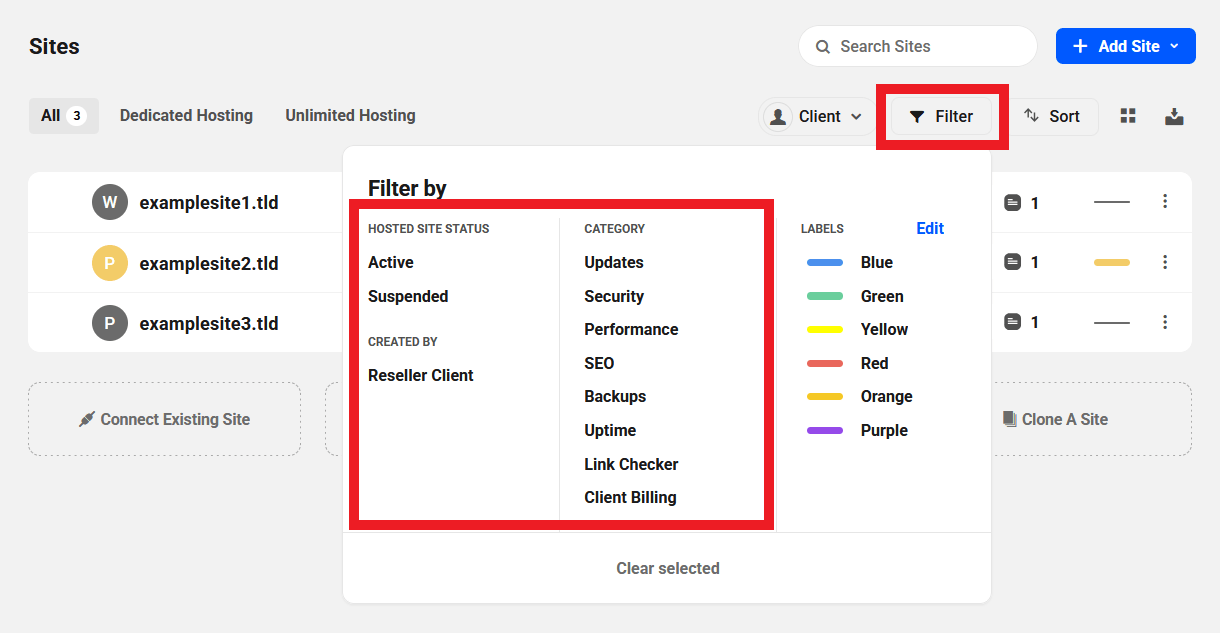
Filter by Hosted Site Status or Creator
Active
These are all the active WPMU DEV hosted sites in your Hub.
Suspended
These are sites that you have suspended using the Suspend Site option under the Hosting > Tools tab of those sites.
Reseller Client
These are hosted sites purchased from you through the Reseller feature in your Hub.
Filter by Category
When you select a category, any sites that are experiencing issues related to that category will be listed. The relevant sites will appear with an icon associated with the issue and a status giving more information about the problem. Clicking on the icons will take you to the Hosting Overview dashboard page in the Hub.
Updates
If this category is selected, the sites that require updates will appear. The update icon will be visible in the site row with a counter indicating how many updates are available for that site.
Security
Select this category to view sites with security issues that need to be tweaked. The security icon will be accompanied by the number of security issues to be resolved. For more information on resolving security issues picked up by our Defender plugin, visit the Security Tweaks document.
Performance
Choose the Performance category to group sites that have performance opportunities to be actioned. The performance icon will display your site’s current performance score in our Hummingbird plugin.
SEO
Click on the SEO category to view sites with optimization issues that need attention. This is based on your SEO performance in the WPMU DEV Smartcrawl plugin.
Backups
If the Backups category is selected, sites that have backup problems will be listed. The listed sites will show the backups icon with an informative status message.
Uptime
When the Uptime category is chosen, any sites experiencing downtime issues will be listed. The Uptime icon will appear with a status describing the issue.
Link Checker
When the Link Checker category is selected, any sites with broken links or backlinks will be listed.
Client Billing
Selecting the Client Billing category will display sites with outstanding invoices from your Client Billing tool.
2.3.2 Labels
Link to chapter 3Label Websites
Labels allow you to categorize your websites in any way you see fit, and filter the display of all sites to show only the ones you want.
Note that if you have team members or clients accessing your Hub, any labels you set will be visible only to you, and any labels set up by a team member or client will be visible only to that user.
The Hub includes 6 preset color-coded labels for grouping and sorting websites. To select a label for a site in the List view, hover over the space next to the three-dot icon for the site, and click on the label icon that will appear. You can customize these preset labels and add your own as well. See Customize Labels below for more on that.

A drop-down menu will appear with the different color-coded labels available and all you have to do is click on the desired label to assign it to that site.
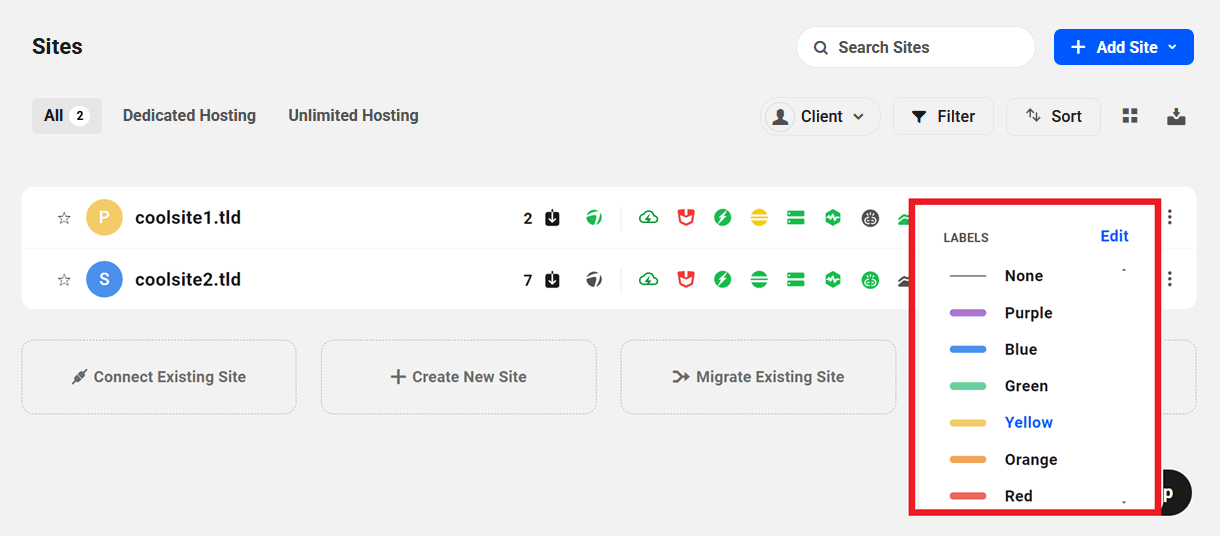
Only one label can be assigned to a site at any given moment but labels can easily be changed by simply selecting a different label, or removed by selecting None.
The default available labels are:
- None
- Purple
- Blue
- Green
- Yellow
- Orange
- Red
Labels can also be assigned to sites in the Grid view through a similar process. The only difference being that the label icon is located to the top-right of the icon list.

Filter by Label
To filter sites associated with the same label, click on Filters & Labels and select the label you want to action.

Multiple labels can be selected which will display all sites associated with any of the chosen labels. In the example below, both the orange and blue labels have been selected, meaning that sites labeled with either the orange or blue tag are listed.

Customize Labels
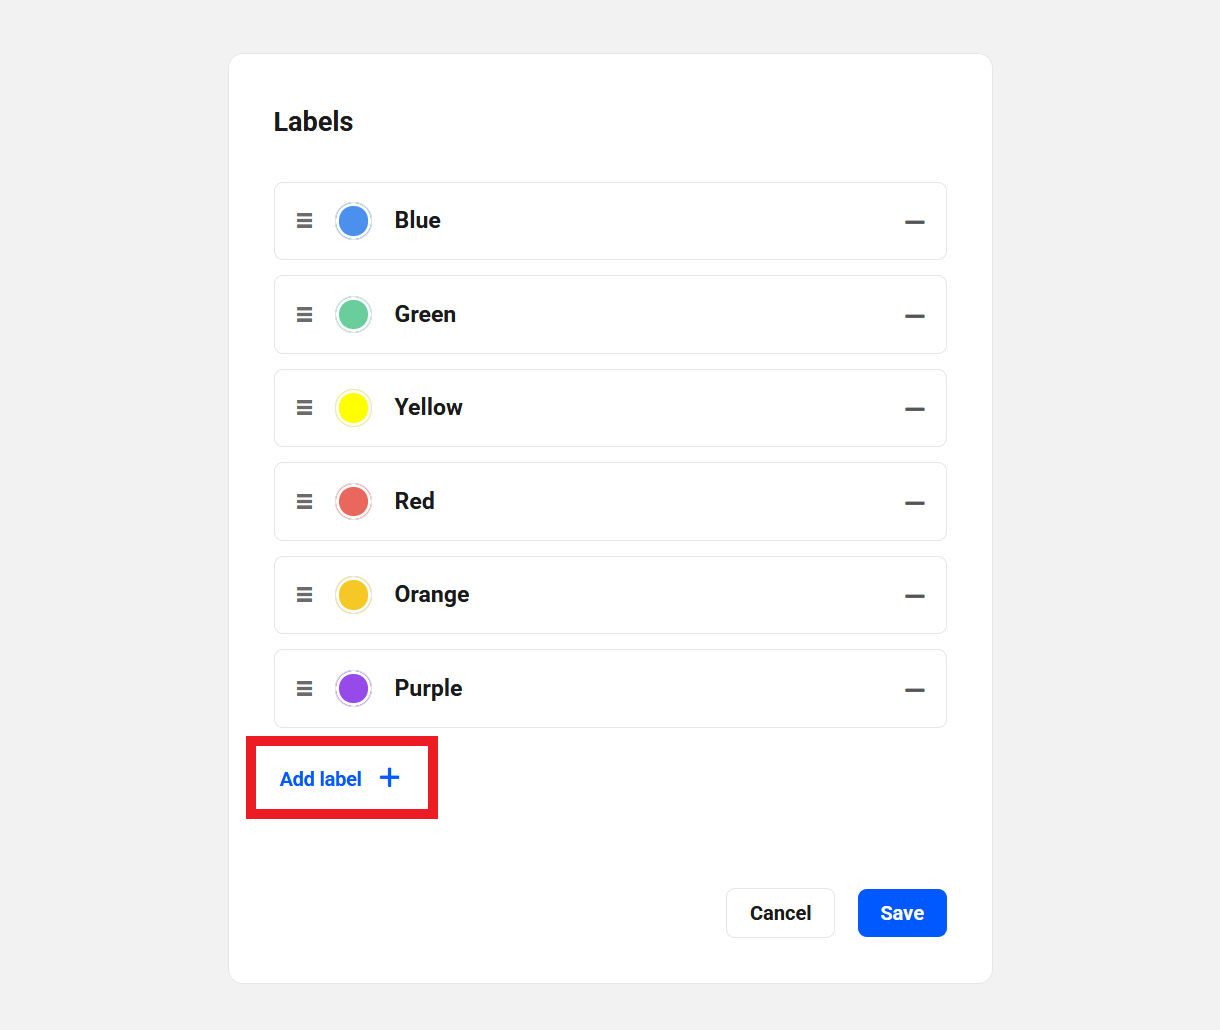
In order to give you more control over the organization of your sites, the Hub allows you to customize your labels. Click on Filters & Labels and click the Edit link to access the configuration panel.

The configuration panel allows you to add, remove, rename, change colors and change the order in which the labels are listed.
Add
New labels can be added by clicking the plus icon next to Add label.
Remove
Remove labels by clicking on the minus icon.

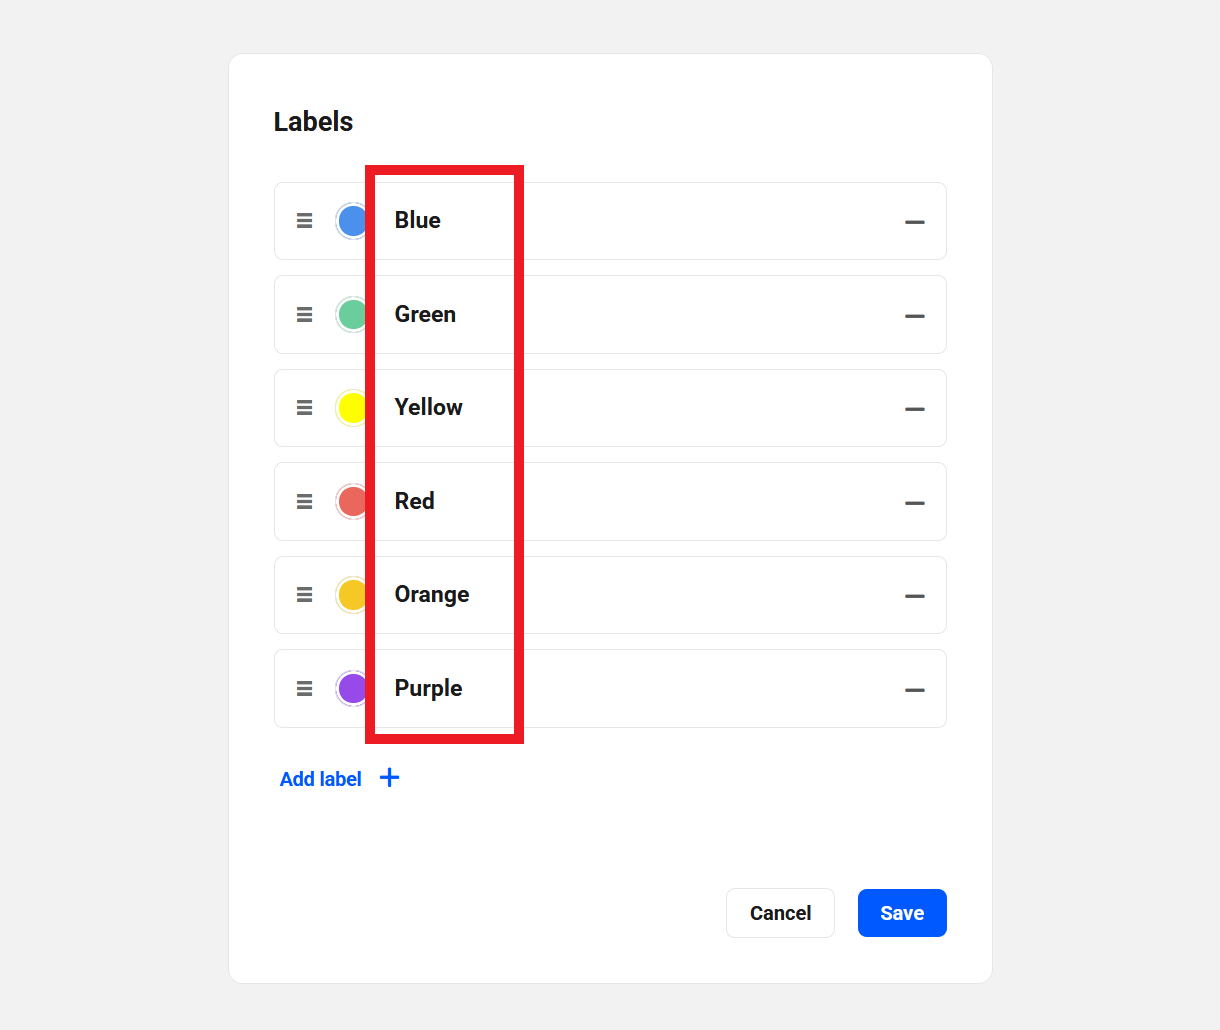
Rename
All labels can be renamed by clicking on the existing name and replacing the text with the new name.
Change Color
To choose a unique color for your labels, click on the circular color icon.
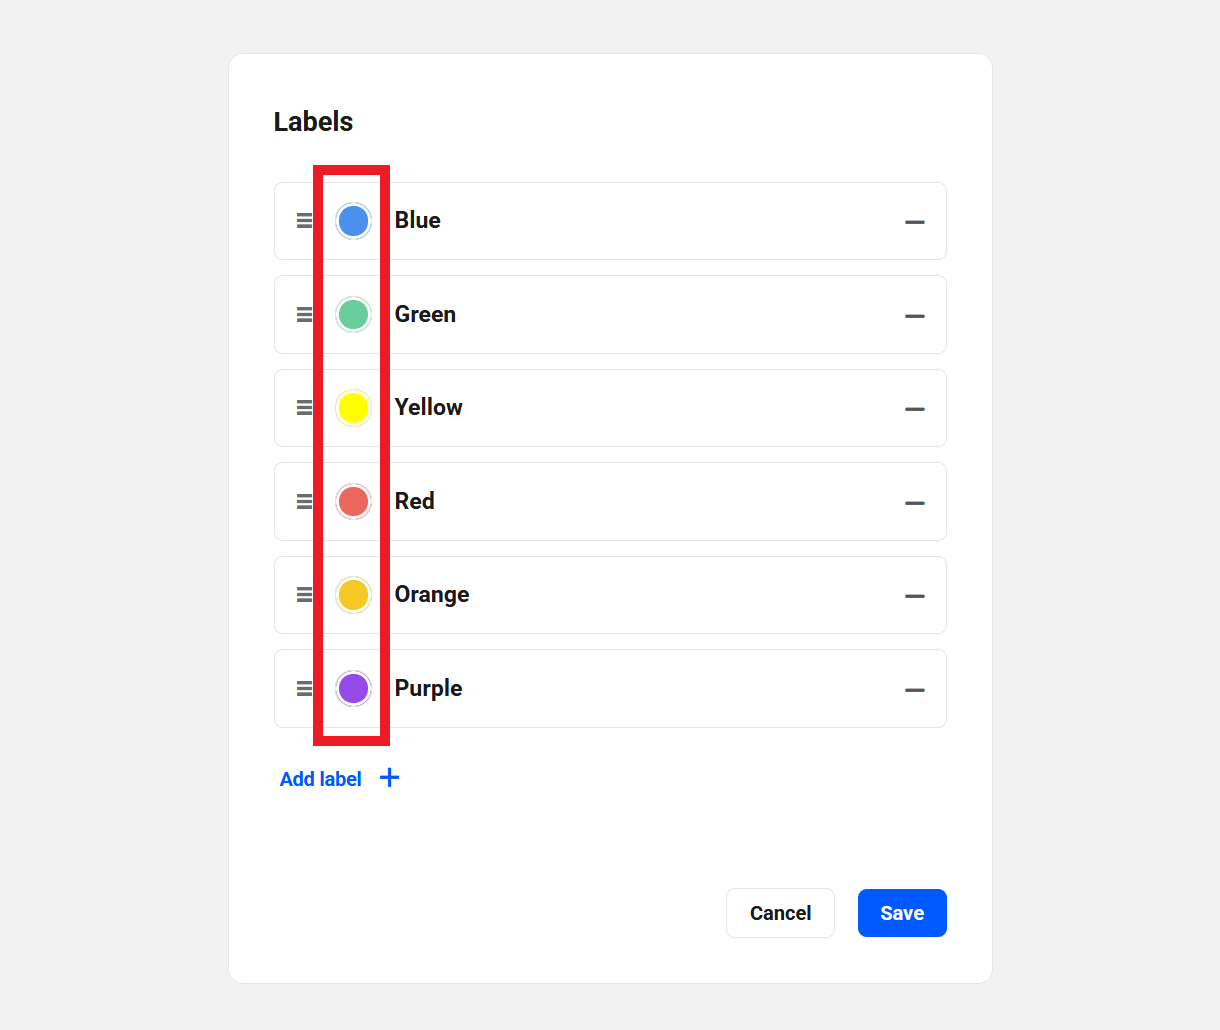
You can then move the color picker to choose the desired color or you can type in the hex color code for a specific color. Click Save to select the new color or Cancel to exit without making any changes to the original color.

Reorder
Labels can be moved around to any order you would like. This can be done by clicking on the icon with three stacked horizontal lines and by dragging the label to its new position.

Remember to click Save to keep all of the changes you have made to your labels. Click Cancel to exit the configuration panel without changing any labels.
2.4 Grid and List View
Copy chapter anchor to clipboardThe Hub has both a Grid view and List view. As noted in the Getting Started chapter, the first time you visit the Hub it is set to the Grid view. After the first visit, your Hub will remember the last selected view used and default to that on your next visit.
Grid View
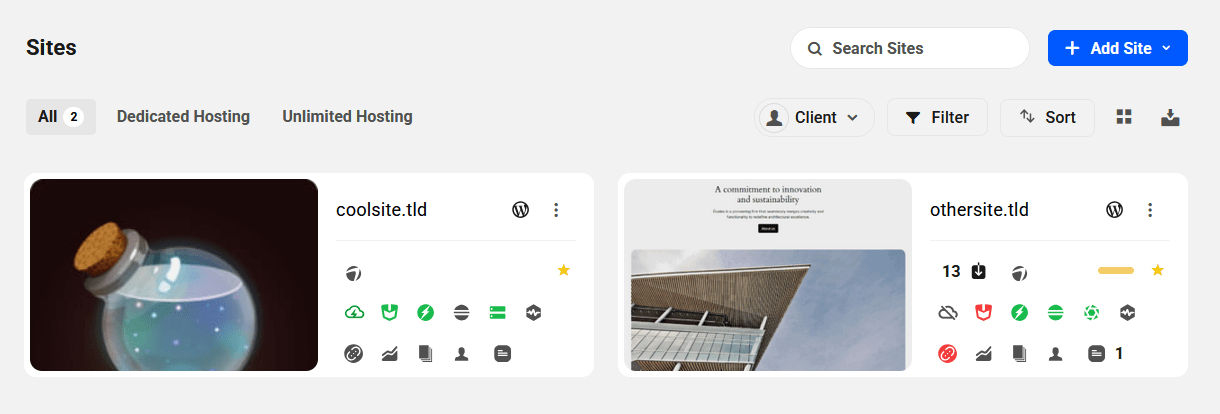
The Grid view pulls a thumbnail screenshot of your site’s home page as a visual representation of the site along with the domain name.
Site Options

Click the three-dot icon in the top-right corner of any site in the grid to open a menu of options for that site.
- Visit site – Opens the homepage of the site in a new tab.
- Re-Sync Site – Enables you to re-sync site data with your Hub if things don’t appear right.
- Migrate site – Appears for 3rd-party hosted sites only. Shortcut to the Migration tool in your Hub.
- Clone site – For sites on WPMU DEV dedicated hosting, this shortcut launches the dedicated site Cloning wizard. For sites on WPMU DEV unlimited hosting servers, this shortcut redirects you to the server overview screen for the corresponding server, and launches the Cloning wizard there. Note that it is not possible to clone a dedicated hosted site to an unlimited hosting server, or vice-versa. If you need to move a site from an unlimited hosting server to its own dedicated environment, use the Migrate Existing Site tool from the dedicated hosting site.
- Create staging site – Appears only for sites on WPMU DEV unlimited hosting. This shortcut redirects you to the server overview screen for the corresponding server, and launches the Create new staging site wizard there.
- Create template – Appears only for sites on WPMU DEV dedicated hosting. Creates a custom template from the site.
- Rename – Shortcut to the Rename feature in the site Settings.
- Settings – Opens the Settings options for that site in your Hub.
- Disconnect site – Appears for 3rd-party hosted sites only. Logs you out of the WPMU DEV Dashboard in the site’s wp-admin and disconnects the site from your Hub.
- Suspend/Unsuspend site – Appears for WPMU DEV hosted sites only. Enables you to suspend or unsuspend access to the site for any reason; for example, if a client does not pay you for services rendered.
- Delete site – Appears for WPMU DEV hosted sites only. Click if you need to delete the WPMU DEV hosted site from your account. You will be prompted to confirm the action.
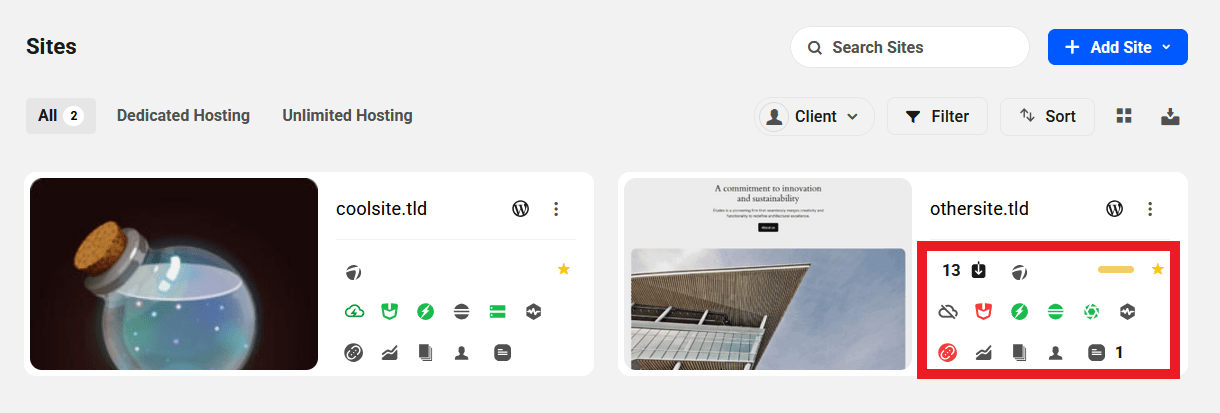
Each site in the grid also contains several icons representing the current state of features or actions that can be taken for that site.
Updates

- The Updates icon (dark gray with a down-pointing arrow) displays information about available core/plugin/theme updates for the site (if that icon is absent, that means there are no updates available).
- Hover your mouse over the icon to reveal the available updates for your site. You can update things individually, or update everything on the site with a single click, right from this screen.
- Click the icon to be redirected to the Updates screen for that site in your Hub for more detailed information and features.
Automate
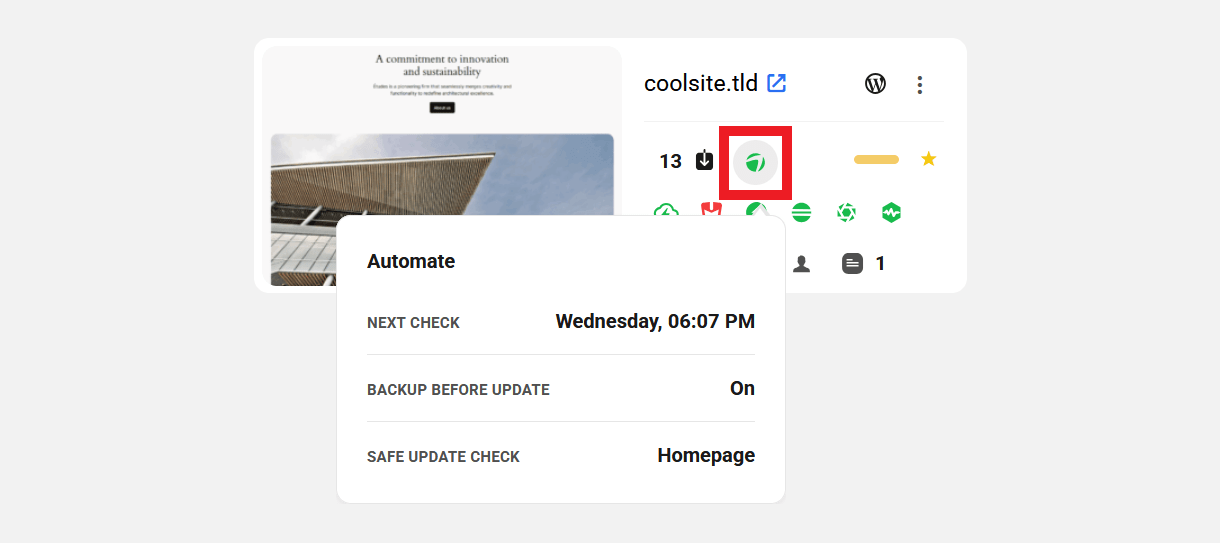
The automate icon is present right next to the updates icon and it provides information about the automate configuration. It appears gray if the feature is not active on the site, green if there are no issues, and red if there are issues needing your attention.
Hover over the automate icon to view the status of the “Backup before update” and “Safe Update Check” options and the schedule at which the next update check will run.
Labels & Favorites

- You’ll see a star icon at the far right if you’ve Favorited that website).
- The label you may have applied to the site (if any) also appears here.
Hosting
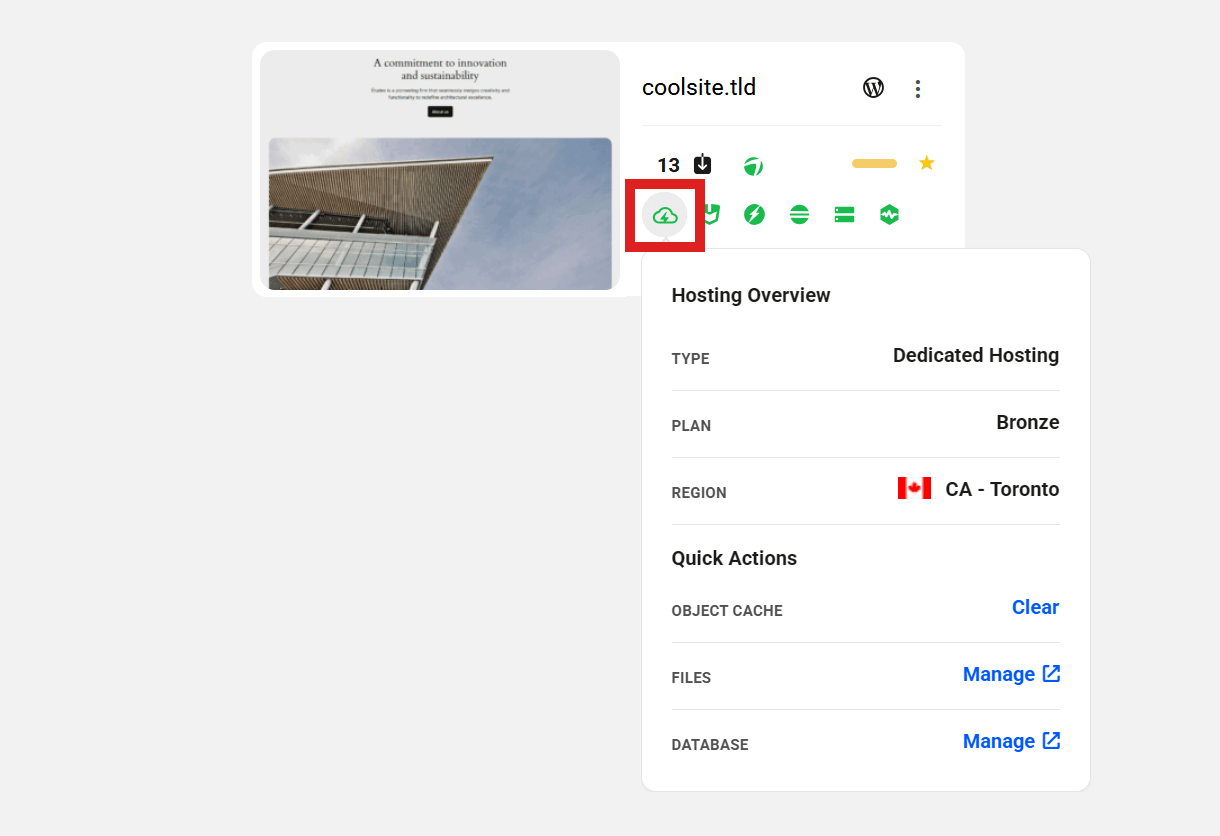
- The icon will appear as a green outlined cloud if the site is on WPMU DEV dedicated hosting, as a cloud overlaid with an infinity symbol if the site is on a WPMU DEV unlimited hosting server, or as a gray outlined cloud with a strike through it if hosted by a 3rd-party.
- If your site is hosted by WPMU DEV, hover your mouse over the icon to reveal basic info about the site’s hosting plan and options to manage the site’s cache, files, and database.
- Click on the icon to be redirected to the Hosting overview screen for that site in your Hub.
Note that information about the hosting Type and Plan/Server is not visible to your clients.
Security

- The Security icon provides information about the Defender plugin configuration for the site. It appears gray if the plugin is not active on the site, green if there are no issues, and red if there are issues needing your attention.
- Hover your mouse over the icon to see basic info about the security of the site.
- Click the icon to be redirected to the Security overview screen for that site in your Hub.
Performance
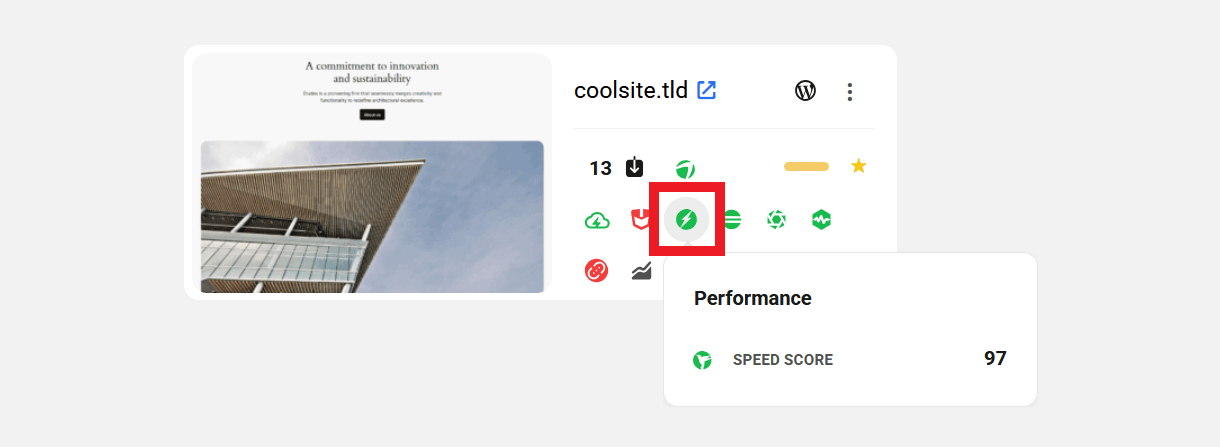
- The Performance icon provides basic info about the Hummingbird plugin configuration for the site. It appears gray if the plugin is not active on the site, green if there are no issues, and red if there are issues needing your attention.
- Hover your mouse over the icon to see basic info about the performance of the site.
- Click the icon to be redirected to the Performance overview screen for that site in your Hub.
SEO

- The SEO icon provides basic info about the SmartCrawl plugin configuration for the site. It appears gray if the plugin is not active on the site, green if there are no issues, and red if there are issues needing your attention.
- Hover your mouse over the icon to see basic info about the SEO score of the site.
- Click the icon to be redirected to the SEO overview screen for that site in your Hub.
Backups

- The Backups icon provides information about the backups for the site.
- If your site is hosted with WPMU DEV, a server stack icon will display to indicate Hosting Backups.
- If your site is hosted with a 3rd-party. the Snapshot plugin icon will display.
- The icon appears gray if the Snapshot plugin is not active on a 3rd-party site, green if backups are available and scheduled, yellow if Snapshot is active but no backups yet, and red if backups are failing or if Snapshot is active on a 3rd-party site but backups are not yet configured.
- Hover your mouse over the icon for info about the latest backup.
- Click the icon to be redirected to the Backups overview screen for that site in your Hub.
Uptime

- The Uptime icon indicates whether your site is currently available or if it is down.
- It appears green if the site is up red if it is down, or gray if the feature is not yet active on the site.
- Hover your mouse over the icon for basic Uptime info.
- Click the icon to be redirected to the Uptime overview screen for that site in your Hub.
Link Checker
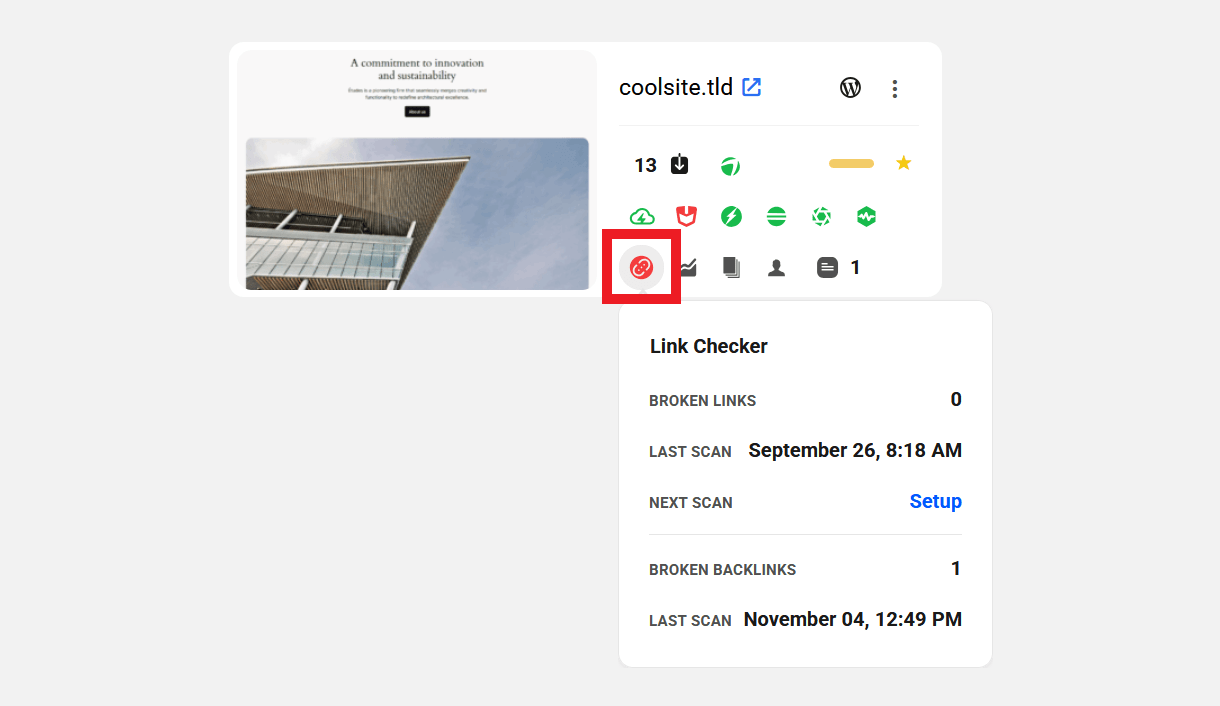
- The Link Checker icon displays basic information about the most recent scans for Broken Links and Backlinks for the site.
- It will appear green if either or both of the features are active on the site and no broken links of either type were found, red if one or more broken links were found in either feature, and gray if neither feature is yet active on the site.
- Hover your mouse over the icon to view basic information about broken links found on your site, if any.
- Click the icon to be redirected to the Link Checker overview screen for that site in your Hub.
Analytics

- The Analytics icon provides basic information about your site’s traffic.
- It will appear green if the feature is active on the site, or gray if it is not.
- Hover your mouse over the icon for basic Analytics information. You can adjust the data displayed to show the last 1, 7, 30 or 90 days right in that info bubble.
- Click the icon to be redirected to the Analytics overview screen for that site in your Hub.
Reports

- The Reports icon displays basic information about the next scheduled report for that site.
- It will appear green if there is a scheduled report, or gray if there is none yet.
- Hover your mouse over the icon to view the name and date of the next scheduled report.
- Click on the icon to be redirected to the Reports overview screen for that site in your Hub.
You’ll also notice a couple of features at the top-right of each site in the grid.
Client
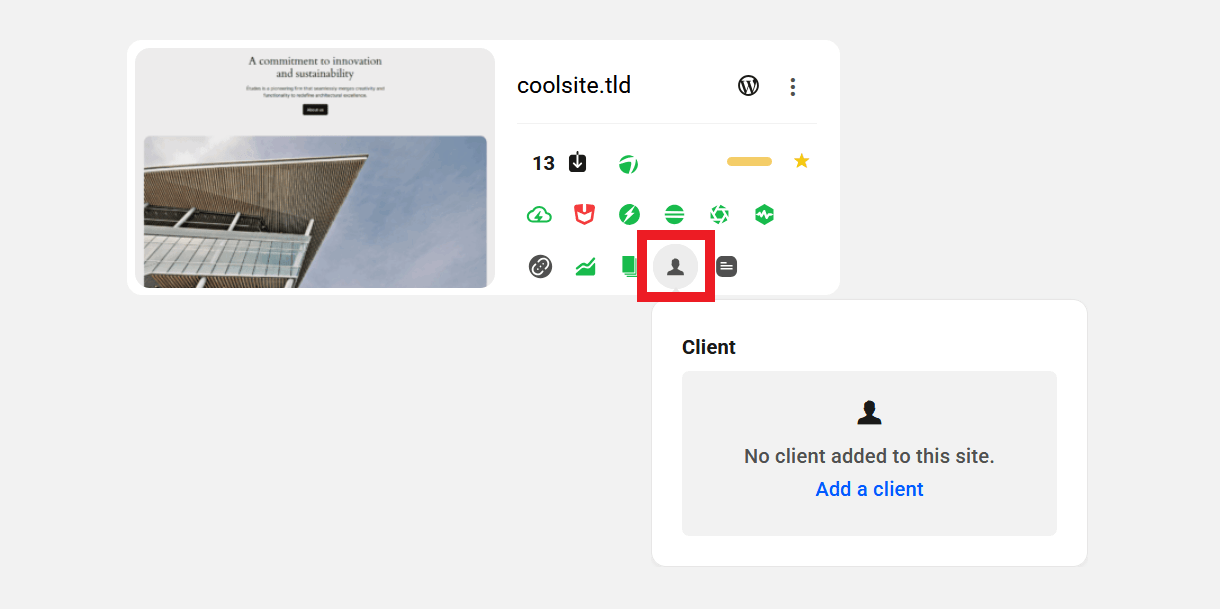
- The Client icon displays summary information about the client linked to the site, as well as any billing activity related to the site.
- It will appear green if a client is linked to the site with no payment due or failed invoices, red if there are payment due or failed invoices, and grey if a client is not attached to the site.
- Hover your mouse over the icon to view the name of the Client attached to the site along with the number of subscriptions and outstanding invoices (if any), as well as your MRR & Net Billing amounts.
- Note that the label appears only as Billing for logged-in clients, who would not see their own name appear there, and MRR would be replaced with Monthly Recurring Billing.
- Click on the icon to be redirected to the Billing overview screen for that site in your Hub.
Notes

- The Notes icon gives you easy access to create & manage secure notes for the site. The number next to the icon indicates how many notes have been added. See Site Notes in our Managing a Site in the Hub documentation for more information.
- Team members and clients can be given controlled access to site notes if needed. See Site Notes Module in our Team & Client Role Customization documentation for details.
WP-Admin
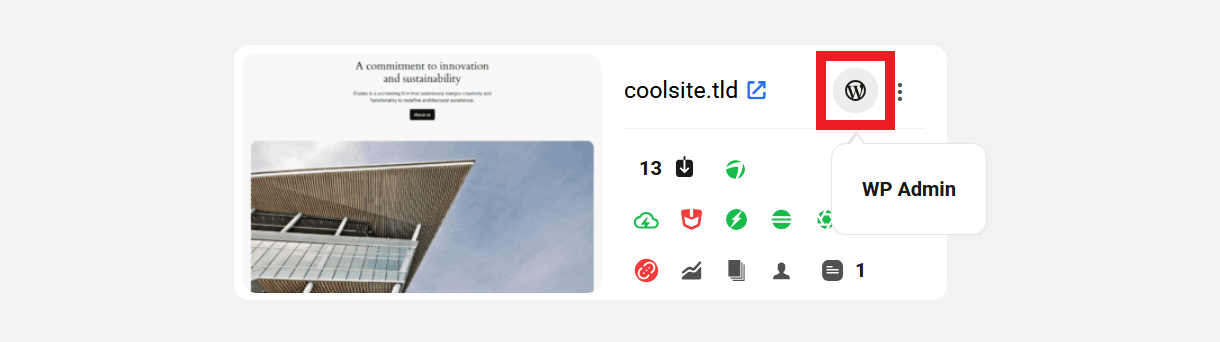
- Click the WordPress logo to be redirected to the wp-admin URL of that site in a new tab.
- If you have also enabled the Single Sign-on feature in the WPMU DEV Dashboard plugin on that site, clicking this link will automatically log you into the site’s wp-admin.
IMPORTANT
If you have granted access to the WPMU DEV Dashboard plugin on a site to additional admin users there, and one of those admin users enables the SSO Login feature from the Dashboard plugin, anyone who accesses the site via SSO will be logged-in as that additional admin instead of you.
This can be especially important to know if you have enabled the SSO Login capability in any Team Member custom role.
List View
Click the List view icon to switch to a List view of your websites. The List view displays your sites without the thumbnail and displays the color-coded icons for available actions.
This view gives you a quicker overall view of your connected websites.
Whichever view was used on your last visit will be used next time you log on to the WPMU DEV Hub.
2.5 Export Site List
Copy chapter anchor to clipboardThe Export Site List option can be found next to the List/Grid View option in the horizontal navigation menu on the Sites screen.
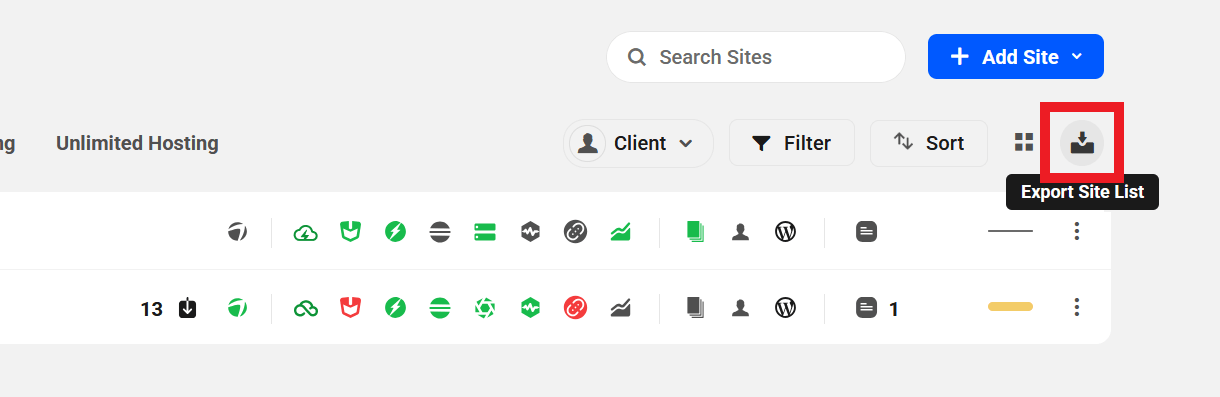
Clicking on this option will generate a CSV file containing data of all the sites in your Hub (WPMU DEV dedicated & unlimited hosting, and 3rd-party hosted). The columns of site data will be sorted as follows:
- Site ID – This is the number that identifies the site in your Hub, and appears in the browser address bar when viewing the site there. For example:
https://vvpmudew.com/hub2/site/1234567 - Site Title – The site URL or the custom title you may have given it in the Site Settings.
- Site Label – The custom label you may have assigned to the site in your Hub.
- WP Version – The WordPress version currently running on the site.
- PHP Version – The PHP version currently running on the site.
- Favorite – This indicates whether you have favorited the site or not in your Hub.
- WPMU DEV Hosting – This indicates whether the site is hosted by WPMU DEV or not.
- Hosting Type – Applies only to WPMU DEV hosted sites. This indicates the hosting type: dedicated or unlimited.
- Status – Applies only to WPMU DEV hosted sites. This indicates the status of the site: active or suspended.
- Server IP – The IP address of the server.
- Primary Domain – If hosted by WPMU DEV, this indicates the primary domain assigned to the site. If hosted by a 3rd-party, this is the domain you entered when connecting the site to your Hub.
- CNAME – Applies only to WPMU DEV hosted sites. This is the tempurl.host name of the site.
- Hosting Plan – Applies only to WPMU DEV hosted sites. This indicates the current hosting plan of the dedicated site or unlimited server.
- Hosting Region – Applies only to WPMU DEV hosted sites. The region where the dedicated site or unlimited server is hosted.
The exported file will have the following name format: My Sites – {current date}.csv
Note that this option is available only to the Hub account owner and team members who have the required access. This option is not available to your clients.
If the site list export is generated by the Hub account owner, it will be automatically sent to the email associated with the account. If a team member exports the site list, the email will be sent only to that team member, not the account owner.
You can grant your team members access to this feature by creating a custom role and enabling access to Export sites in the Sites Module.

2.6 Favoriting a Website
Copy chapter anchor to clipboardThe Favorites feature allows you to group sites by priority, high activity, or any other criteria you deem important.
When hovering over a site in both the Grid and List view an empty star icon will appear. In Grid view, it is in the bottom left corner. In the List view, it is next to the domain name.


Clicking the star icon adds the site to your favorites list. If a site is added to your favorites list it will be marked with a gold star. To remove your site from the favorites List click the gold star and the site will be removed.
As seen in the Sort feature detailed in the Getting Started chapter above, sites that have been favorited can be pinned to the top of your sites List or Grid view so they’re easy to spot at a glance.

2.7 Site Settings
Copy chapter anchor to clipboardThe Site Settings screen enables you to adjust a few options related to the site you’re viewing in your Hub.
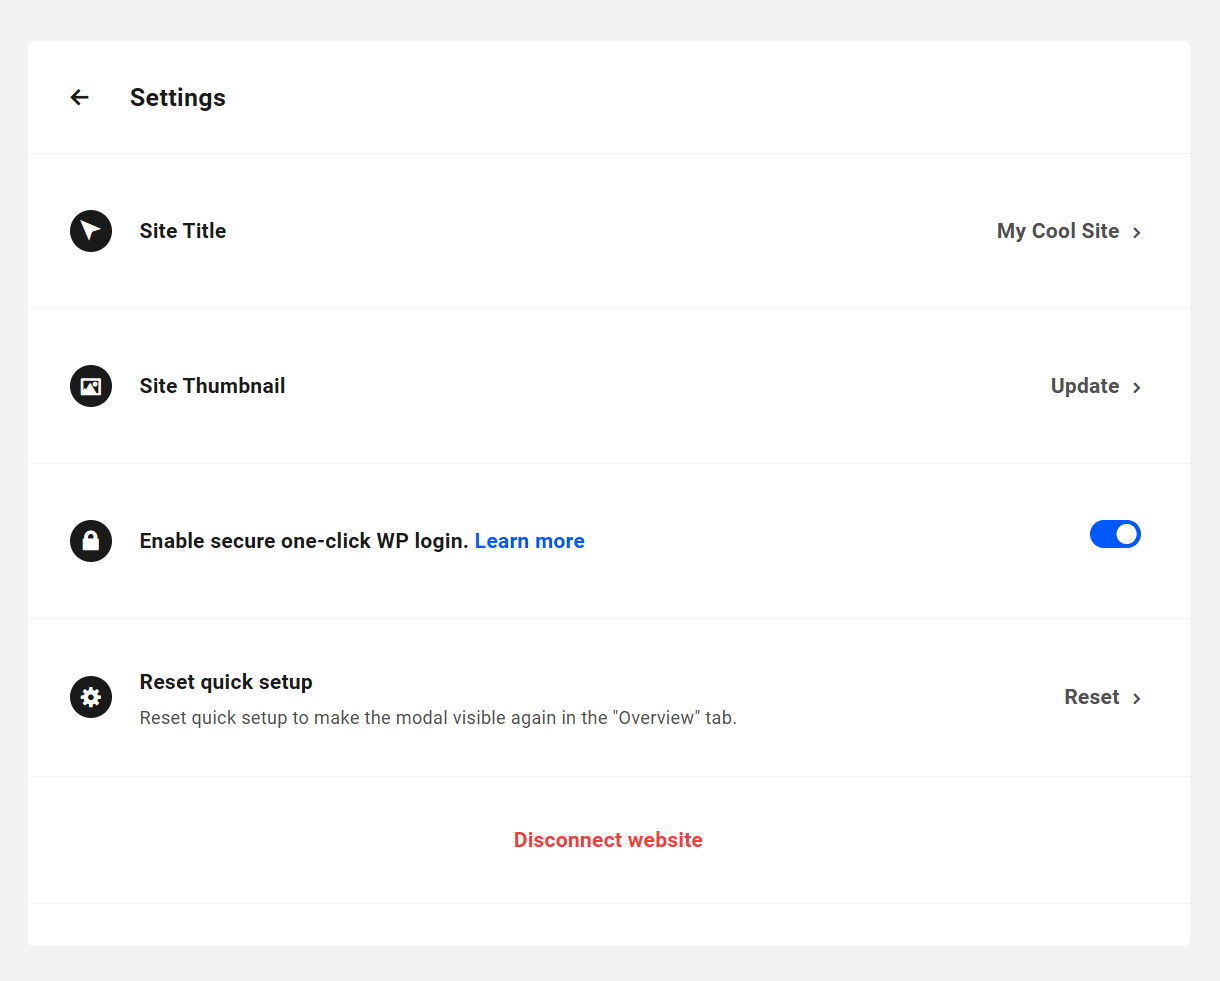
- Site Title – Customize the title that appears for the site in your Hub.
- Site Thumbnail – Allows you to refresh the auto-generated site thumbnail if you make changes to the homepage or upload a custom thumbnail.
- Enable secure one-click WP login – Allows you to one-click access to your site’s wp-admin without having to login every time.
- Reset quick setup – Appears for 3rd-party hosted sites only. If you had previously dismissed the Quick Setup wizard for the site, click this option to get it back again.
The site settings can be accessed from the Site Options menu.
2.8 Get Support
Copy chapter anchor to clipboardIf you still have questions or need assistance after reading this document, please don’t hesitate to contact our support superheroes using the available options under the Support tab in your Hub or via the Support tab in your WPMU DEV Dashboard.