4. Configs

The Configs section in your Hub is where you can manage preset configurations of your WPMU DEV plugins and services, and apply those configurations to any or all of your sites in just a few clicks.
When applying a preset configuration to a site, that configuration will instantly overwrite all the corresponding settings & options for that plugin on the site. This means you can set things up on a site just once, save that configuration in your Hub, and apply it to any or all other site(s).
If you haven’t set up your WPMU DEV account yet, visit The Hub page, where you can explore the features and see pricing packages.
Already a member? Visit your Hub dashboard to get started.
4.1 Getting Started
Copy chapter anchor to clipboardAccess the Configs section by clicking Configs in The Hub main menu on the left.
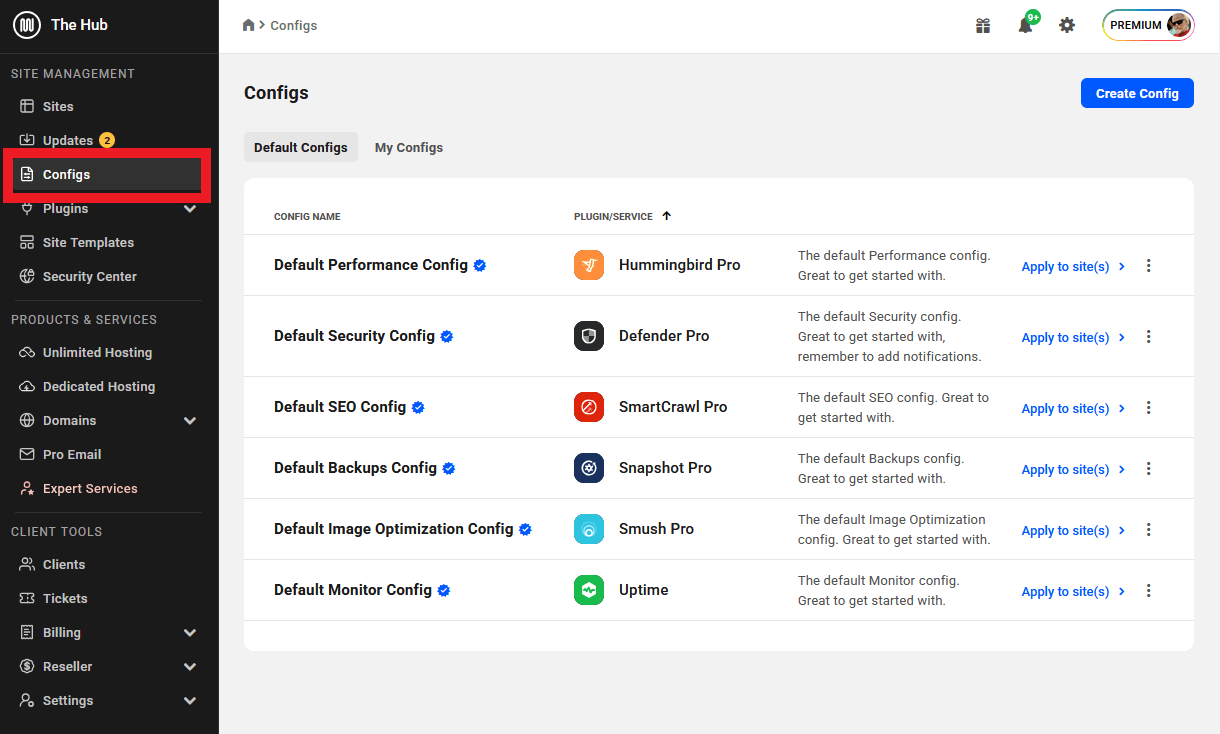
Default configs are available for the following plugins and services, and you can create your own custom configs for any of them as well:
Note that when the Proactive Monitoring add-on is active on a site, the Uptime configs (Default or Custom) can’t be saved or applied on that specific site.
Instead of making painstaking manual adjustments to new sites, simply apply your preferred WPMU DEV plugin and uptime configs with a click. Check out our blog post on building sites with one-click configs via The Hub for a complete overview.
Watch this introductory video to get a good feel for how Configs can help speed up the installation of plugins and deployment of new sites.
The video above illustrates The Hub’s old horizontal main menu, but the functionality described has not changed.
4.2 My configs
Copy chapter anchor to clipboardThe first thing you’ll see are the available default WPMU DEV configs denoted with blue checkmarks. These are designed to get you up and running quickly with the selected plugin/service.
Click the My Configs tab to get started on creating your own custom configs.

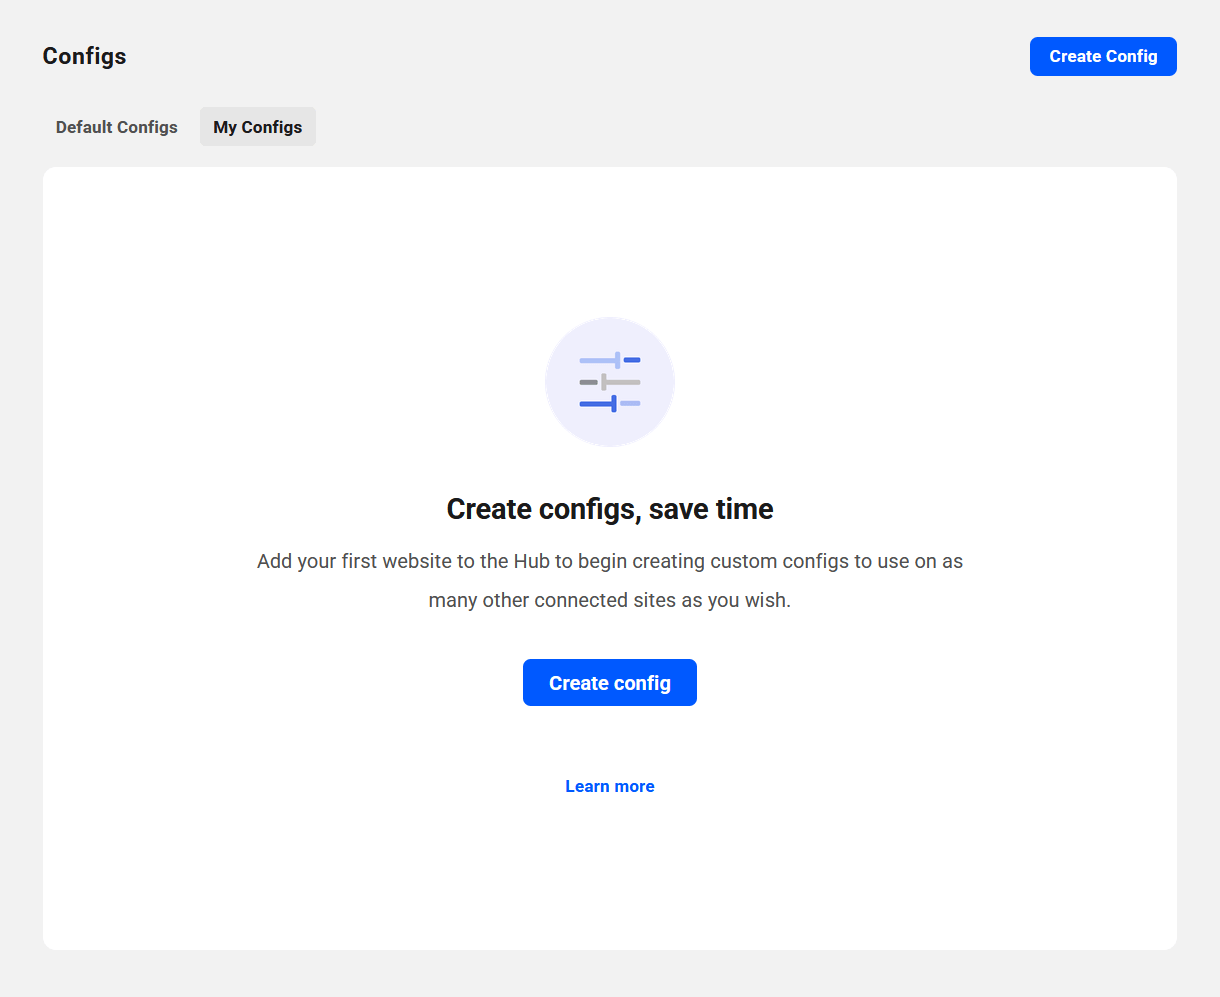
If you have not yet created any, you’ll first see the initial welcome message.
Once you have created at least one config (see below), you’ll see them listed under the My Configs tab.
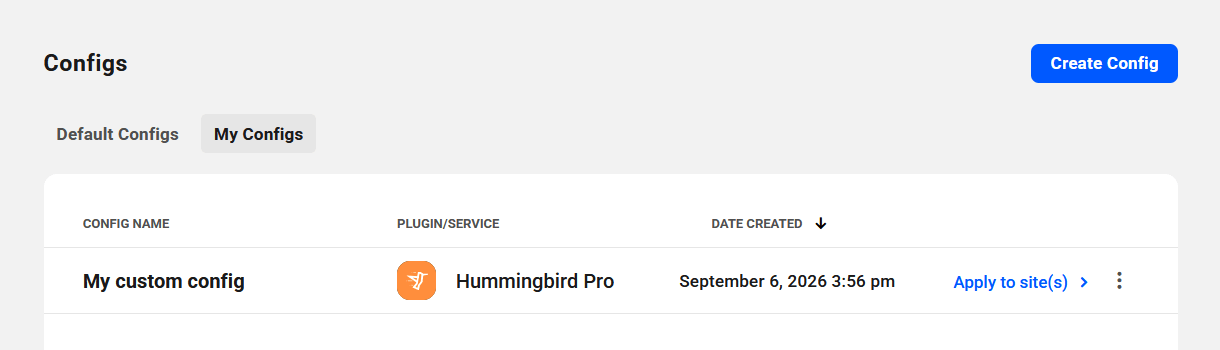
If needed, you can edit the name of a configuration, view further details about it, or delete it, by selecting the appropriate option from the dropdown that appears when clicking on the kebab icon. Note that you cannot rename or delete the default WPMU DEV configs.
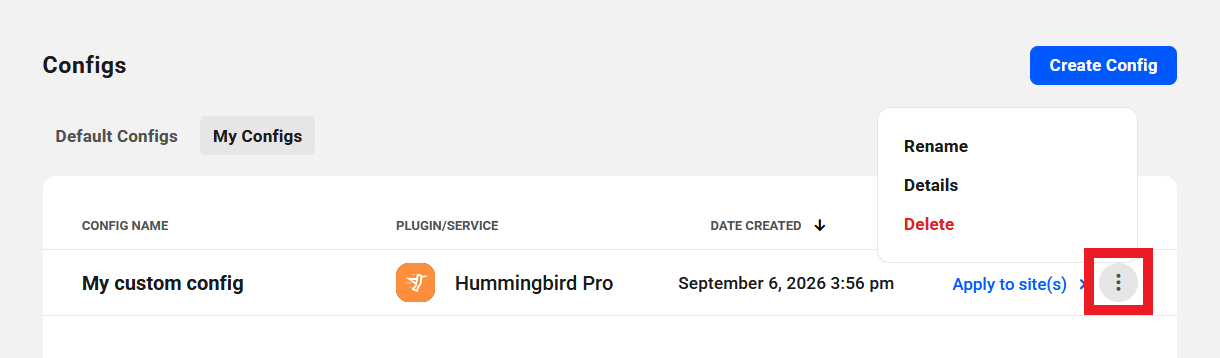
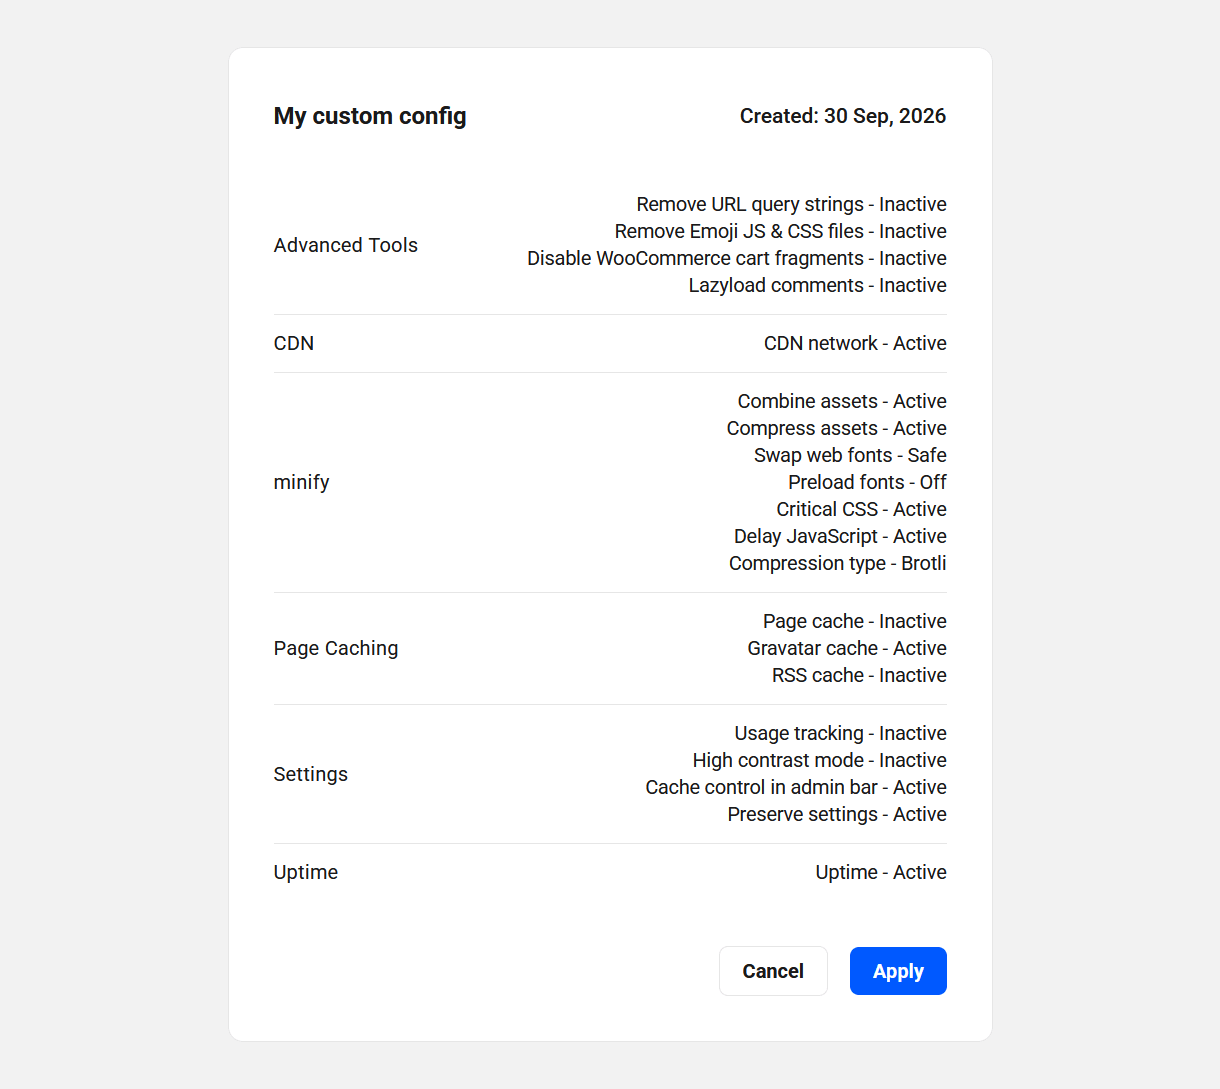
Clicking the Details option there will pop open a modal to display exactly what has been included in that config.
4.2.1 Creating a new config
Link to chapter 2There are two ways to create custom configs for any service:
- From the My Configs screen
- From the Overview screen or applicable plugin/service for any site in your Hub
Creating a config from My Configs
To create a new config for any service from the My Configs screen, click the Create Config button at the top-right of that screen.

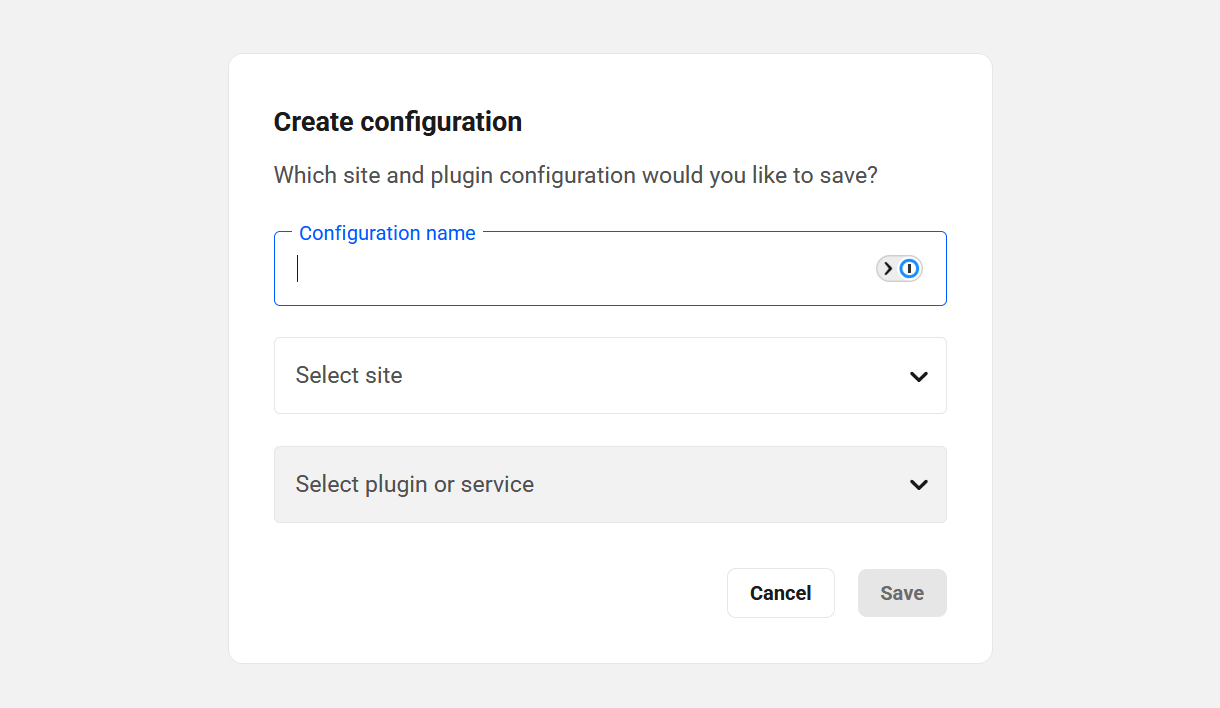
In the modal that pops open, give your config a Name, select the Site you want to create it from, and select the Plugin the config should apply to. Click Save when you’re done.
Creating a config from a site service
You can create a new config for any plugin/service from a site’s Overview screen, or the specific plugin/service screen.
From the site’s Overview screen
Click the kebab icon in the plugin module you want to open the options, and click Save Config.
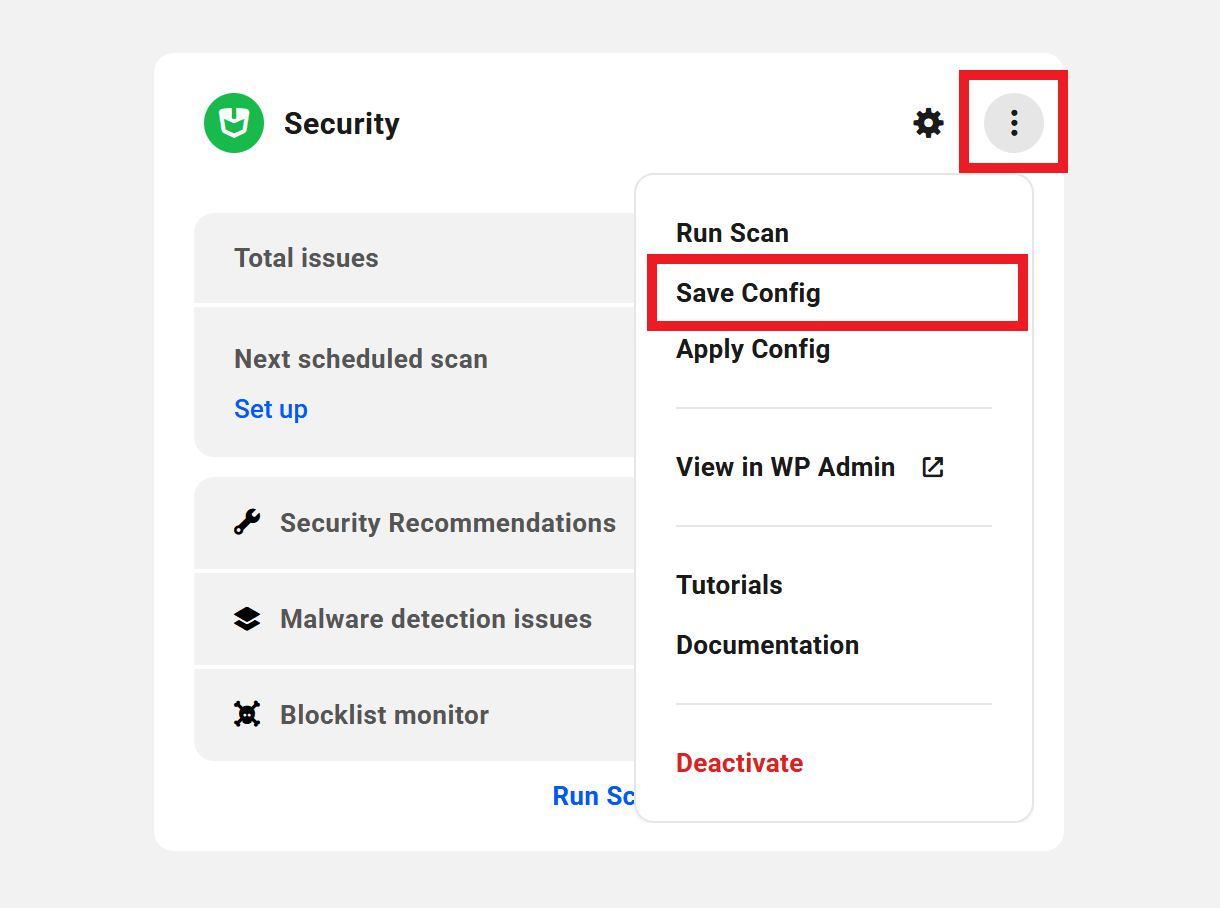
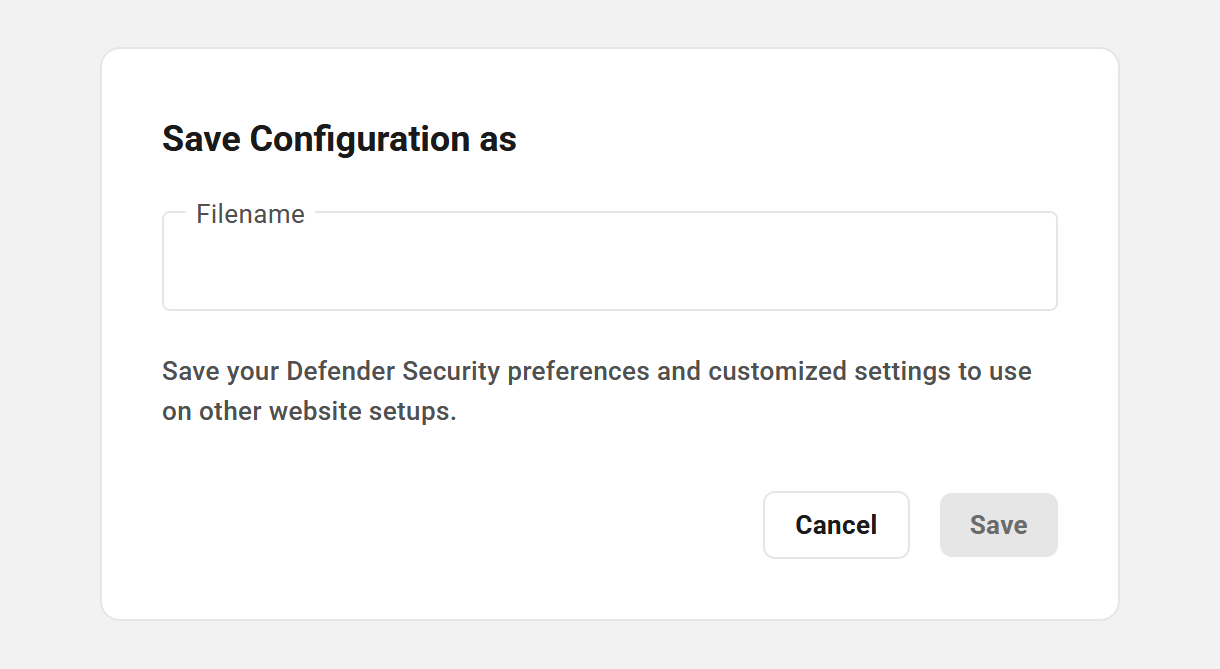
Enter a Name for your configuration in the modal that pops up, and click Save.
From the plugin/service screen
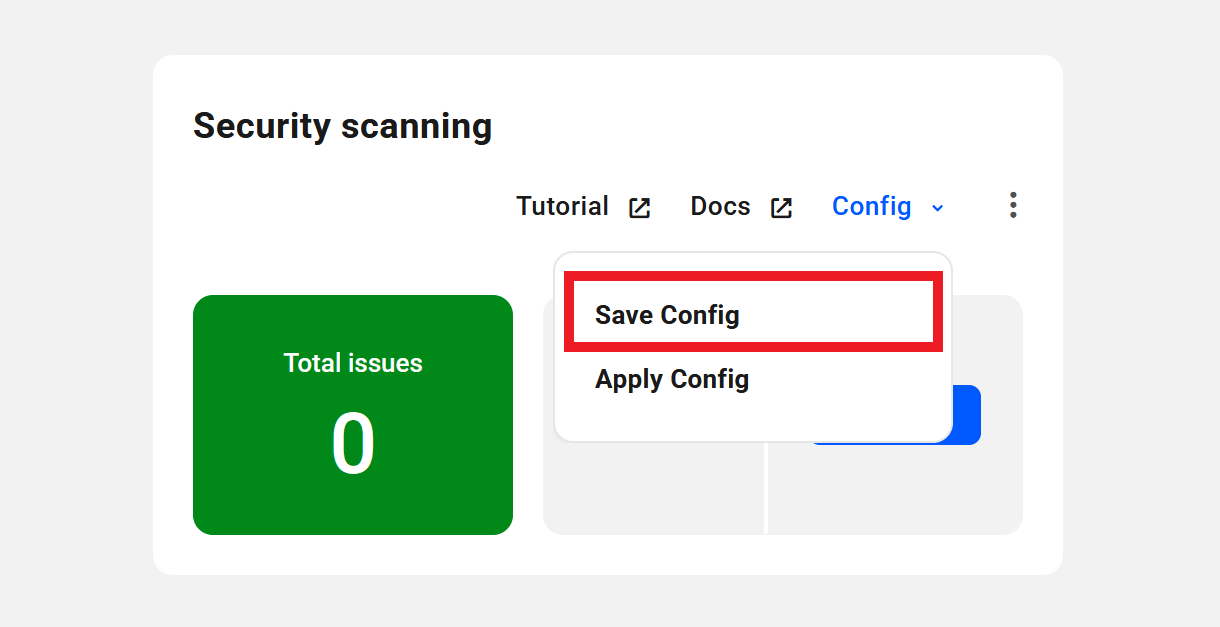
On the plugin/service screen, click Config in the main module on that service’s screen, and select Save Config. Enter the desired config name as above and click Save.
4.2.2 Applying a configuration to a site
Link to chapter 2There are two ways to apply custom configs for any service:
- From the My Configs screen
- From the Overview screen or applicable plugin/service for any site in your Hub
Applying a config from the Configs screen
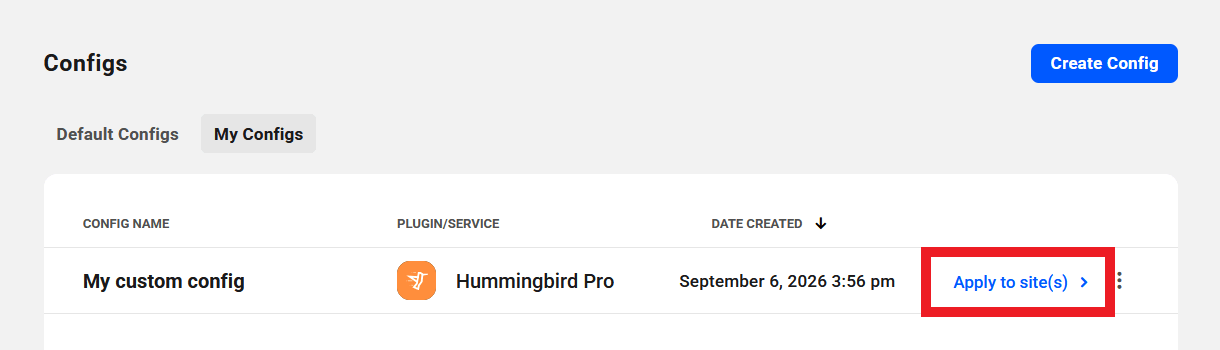
You can apply any of your available configurations to any or all of your sites in one go from the My Configs screen. Click the Apply to site link for the configuration you want.
Then select the site(s) where you want to apply this configuration.
By default, this list will display the first 20 sites in your Hub. If you have more than than that, click the Load More button to load an additional 20. You can also use the Find a website search form to locate the specific one(s) you want.
You’ll see the Apply to “x” sites button will update dynamically with the total number of sites you select. Once you’ve selected the site(s) you want, click that Apply button to apply your chosen config to those sites.

Note that if you apply an Uptime config to a site where Uptime is not yet active, it will be activated automatically. You’ll see a reminder of this when you select the site(s) where you want to apply the config.

Applying a config from a site service
You can apply any one of your preset service configurations to a site while on the site’s main Overview screen, or the service’s screen for that site.
From the site’s Overview screen
Click the kebab icon in the plugin module you want to open the options, and click Apply Config.
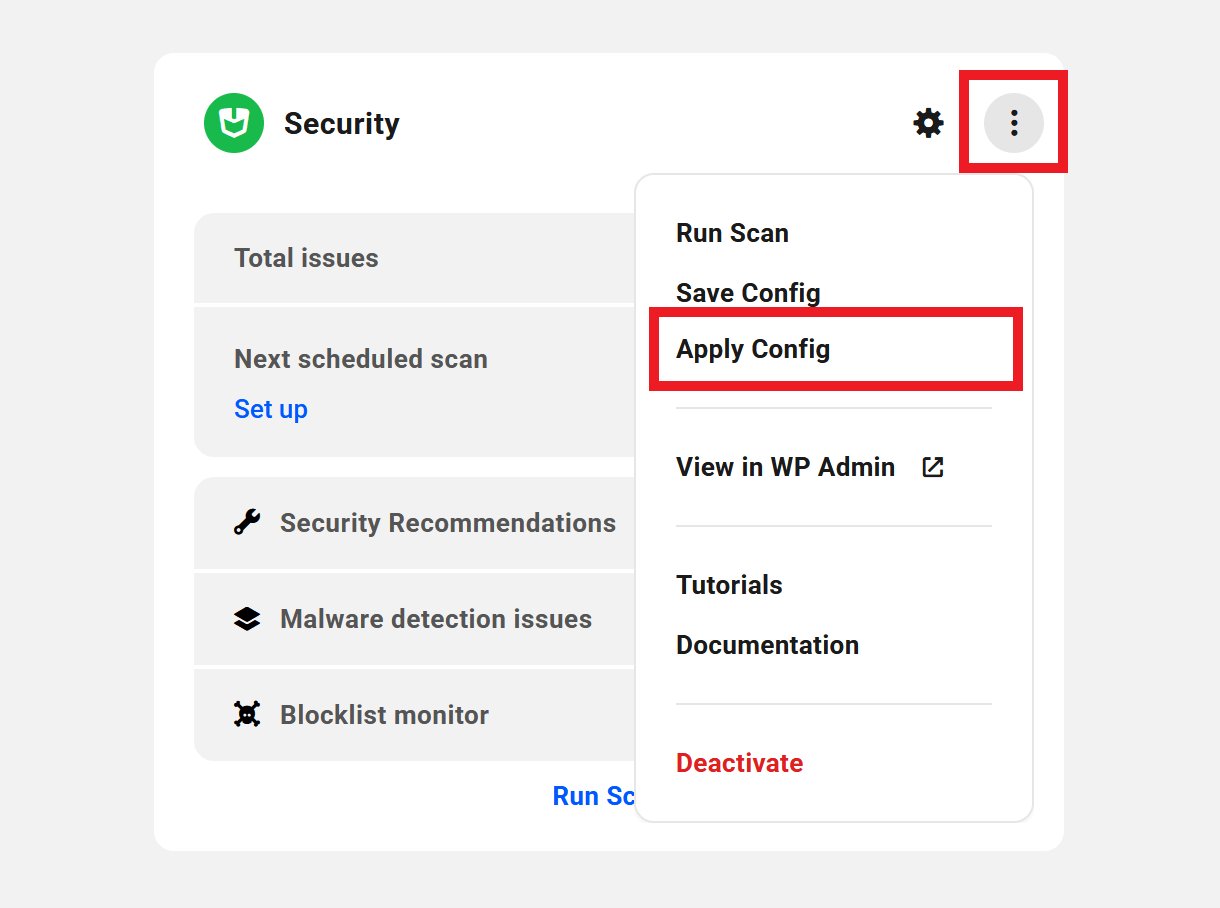
That will pop open a modal displaying all the custom configs you have created for that plugin/service. Select the one you want and click Apply.
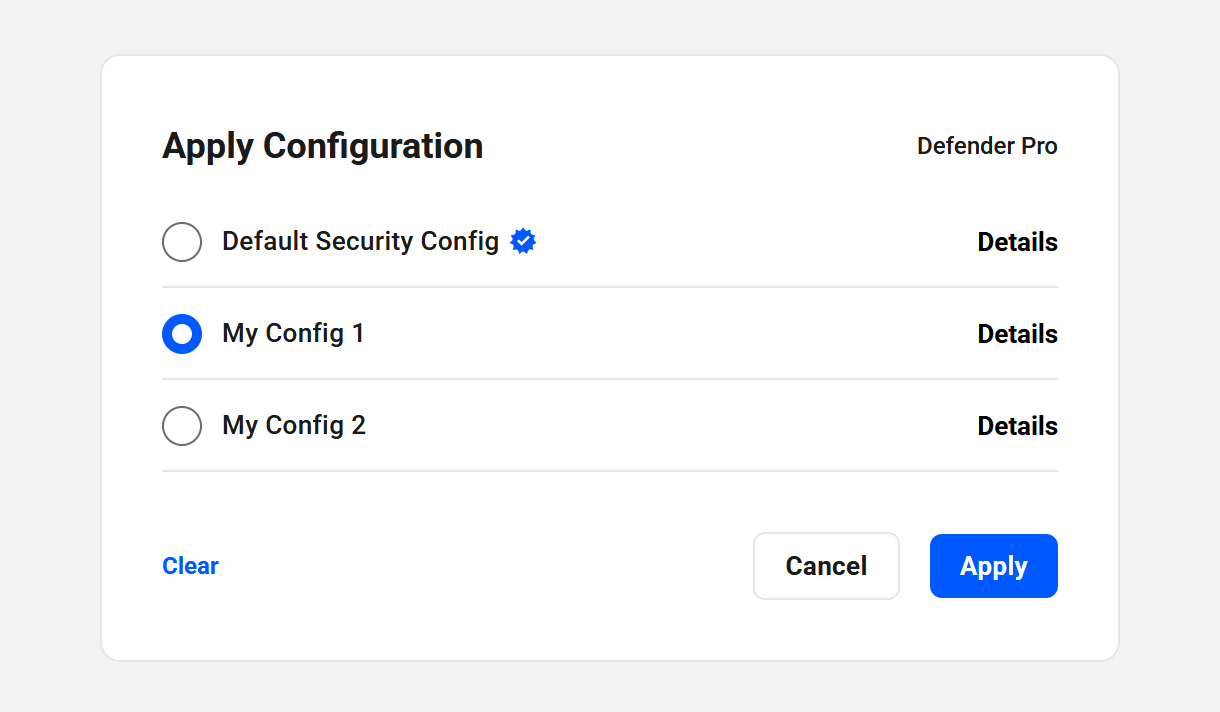
As on the My Configs screen, clicking the Details option here will pop open a modal to display exactly what has been included in that config.
From the plugin/service screen
On the plugin/service screen, click Config in the main module on that service’s screen, and select Apply Config.

In the modal that pops open, select the configuration you want, and click the Apply button.
Again, clicking the Details option here will pop open a modal to display exactly what has been included in that config.
When applying a custom config from a site’s Overview or plugin/service screens, a modal will pop up prompting you to confirm the action. Click Yes to confirm, or Cancel if you do not wish to proceed just yet.

4.3 Quick Setup
Copy chapter anchor to clipboardBy default, every site that you create on our hosting comes equipped with Pro versions of several of our award-winning plugins automatically installed and configured for you.
However, you can use the Quick Setup feature to easily install & configure several premium WPMU DEV plugins & services on any 3rd-party site that you connect to your Hub.
You can apply either our default configurations, or use your own custom ones that you set up in the Configs section of your Hub.
To launch the Quick Setup, click either the Open Quick Setup button in the feature’s hello bar, or click the kebab icon at top right to open the site options, then click the Quick Setup link there.

Clicking either option will open the Quick Setup screen where you’ll see all the services that can be enabled and configured at once on that site.
There are two ways to run the Quick Setup wizard: use the Default Setup or select to use Advanced Options.
The Default Setup is the fastest way to get all available services up and running in just a few clicks using our default configurations. Available services are grouped in 2 categories:
- Security, Backups & Automated Updates – Check this category to include Defender, Snapshot and Automate in the setup.
- Performance & Uptime – Check this category to include Smush, Hummingbird and Uptime in the setup.
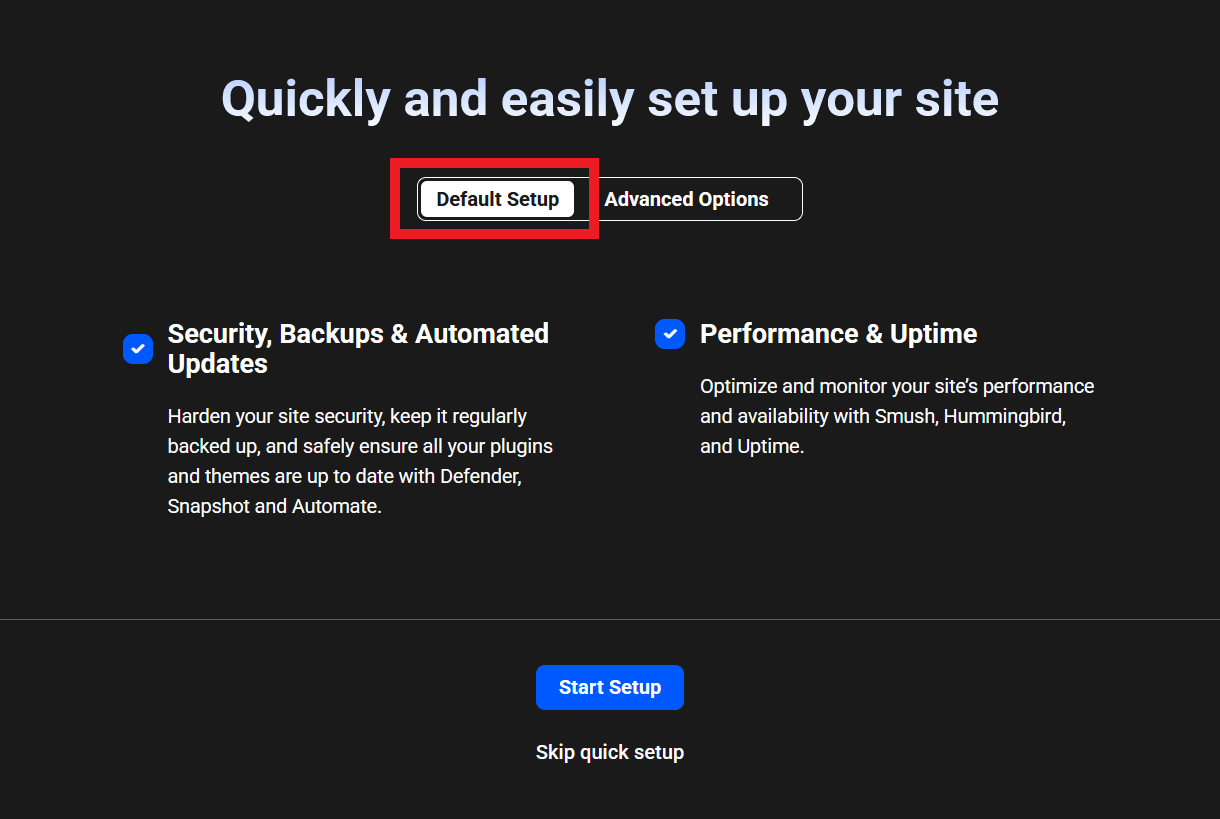
Click the Advanced Options toggle at the top if you prefer to include only selected plugins & services in the setup, and optionally use your own custom configs for them.
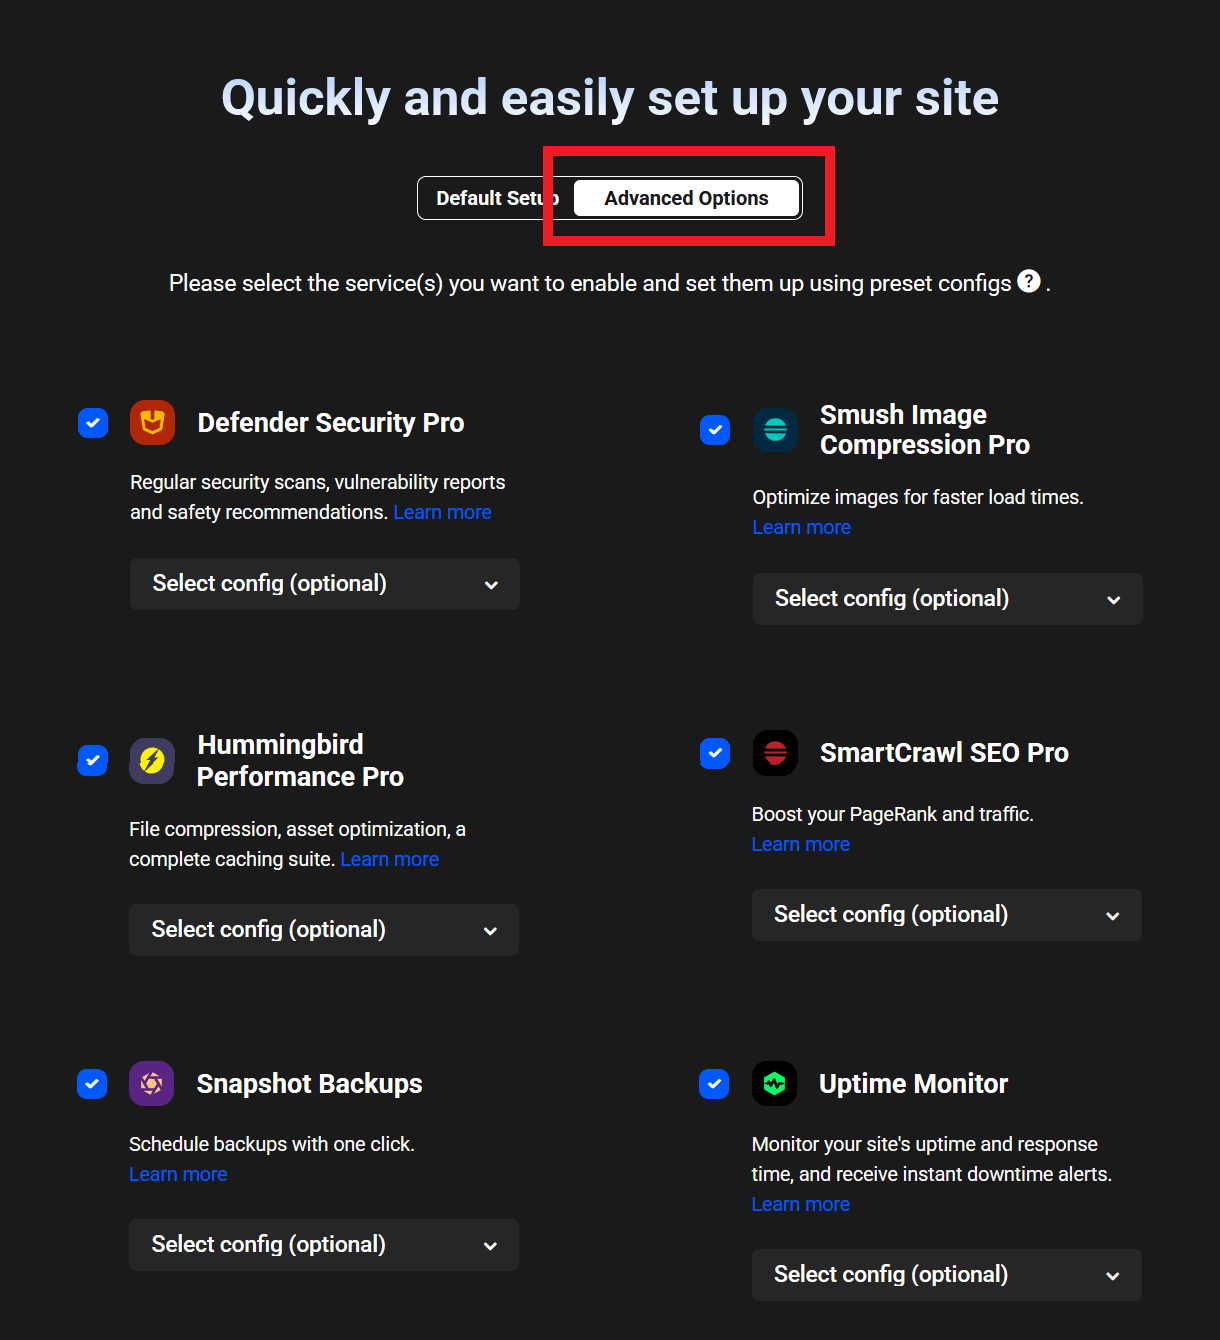
By default, all services are pre-selected, regardless of which option you choose. If there are any services that you do not want to configure with the Quick Setup, simply uncheck them.
Note that if any services are already active on your site, they would be disabled in the Quick Setup wizard (greyed out) as their configuration cannot be overwritten by this feature. In that case, you’d want to first deactivate the desired service in your Hub. Then launch the Quick Setup again, and it will then be available for selection.
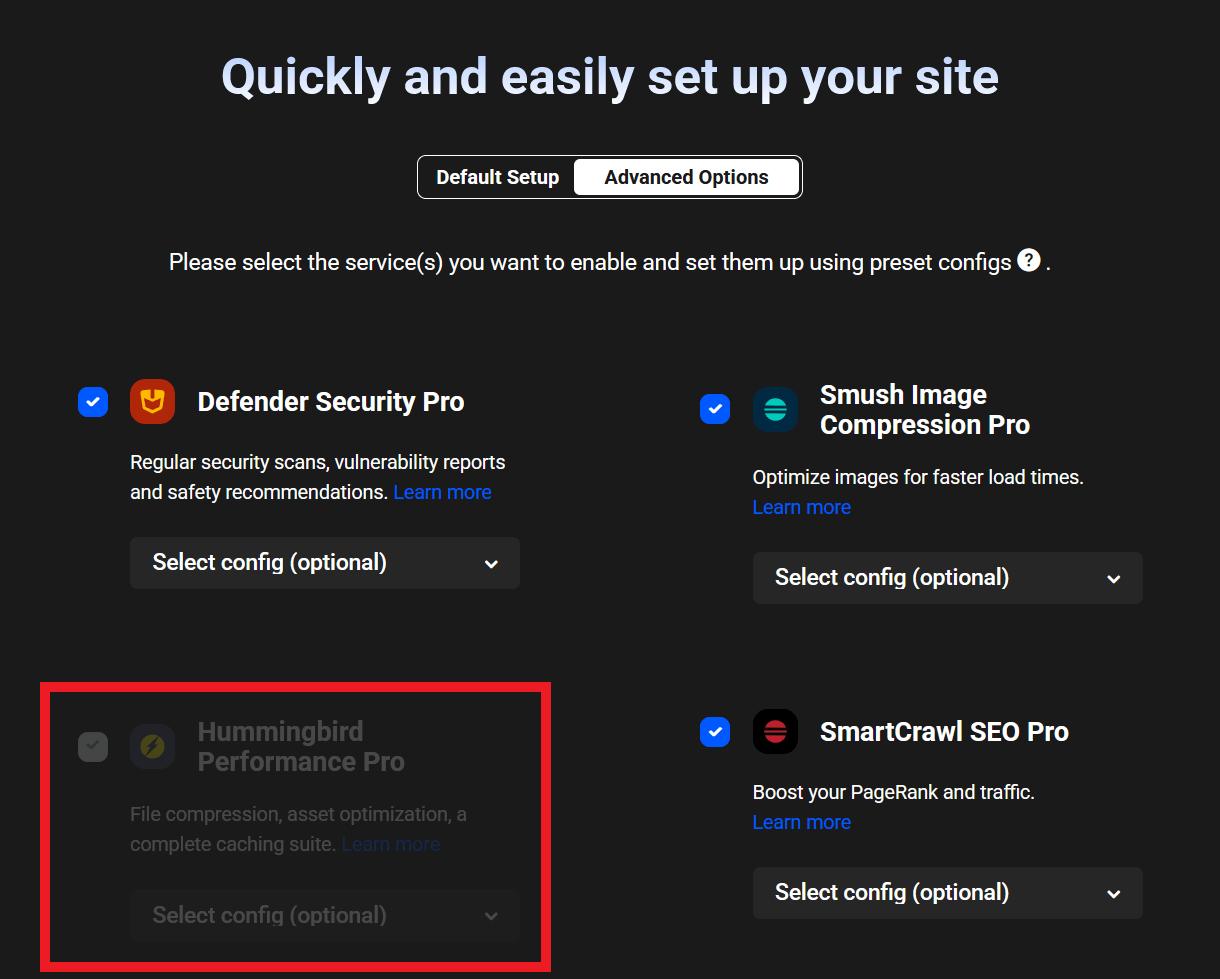
Available services will have an active selectbox where you can select either the default WPMU DEV config, or any custom config you may have already set up. See the My Configs chapter above for more info on creating custom configs.
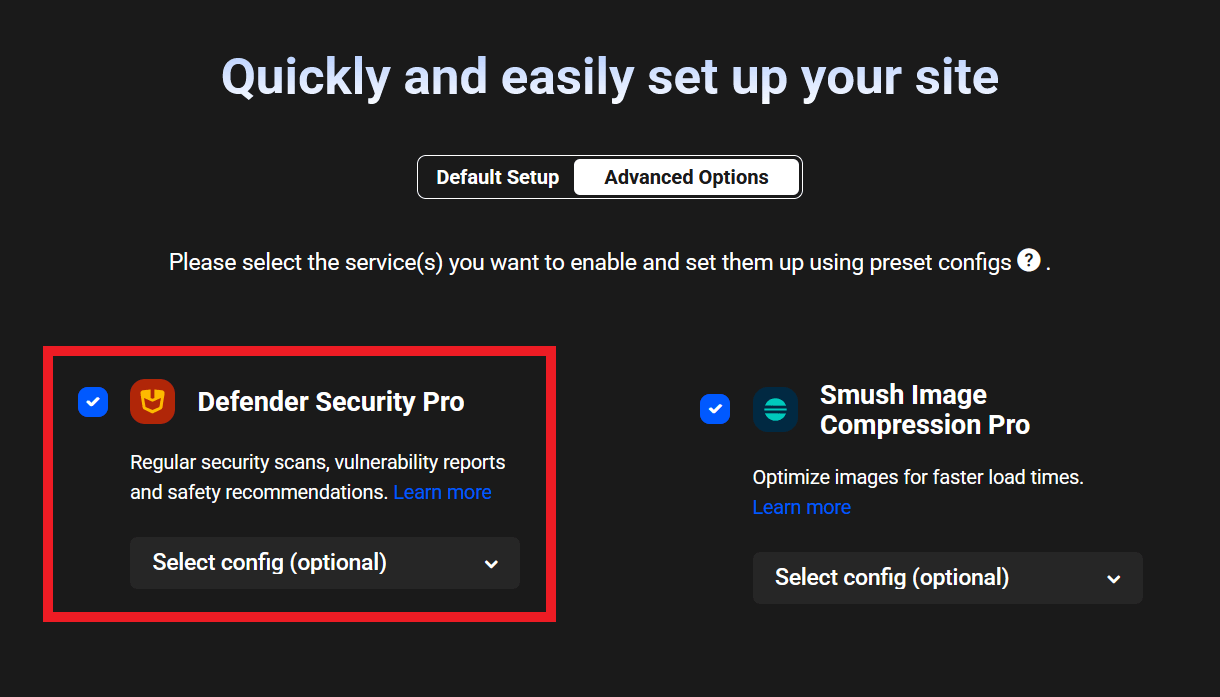
If you have already selected a custom config for a service, and want to revert back to the default WPMU DEV config, simply select the default config at the top of that service’s configs list in the dropdown.

Once you have selected the services you want to configure with the Quick Setup, and have selected any custom configs you want to apply to those services, click the Start Setup button at the bottom.

The configs labels will change to display which services have Completed their configuration, which one is currently Activating, and which are still Pending configuration.
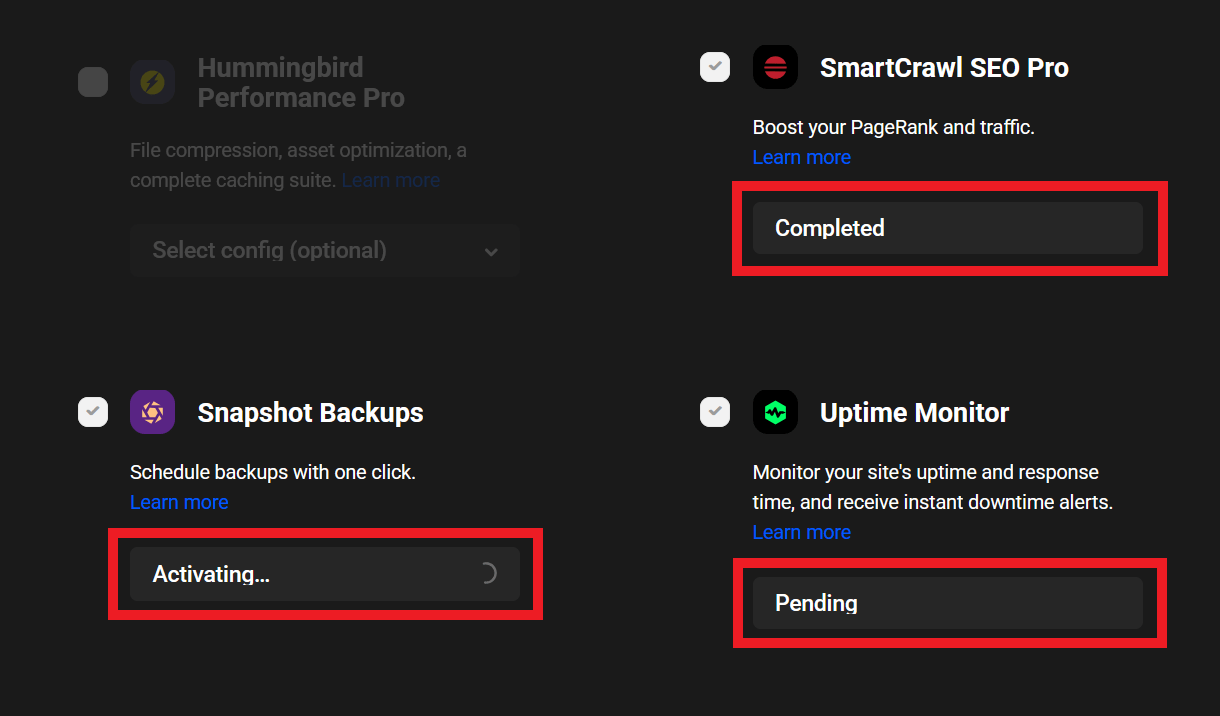
The whole process only takes a few seconds. Once the Quick Setup has completed, your Hub will automatically refresh and you’ll be directed to the Overview screen for that site.
4.3.1 Resetting the Quick Setup
Link to chapter 3You can dismiss the Quick Setup either by clicking the [x] icon in the hello bar to close it, or by clicking the Skip quick setup link at the bottom of the Quick Setup screen.
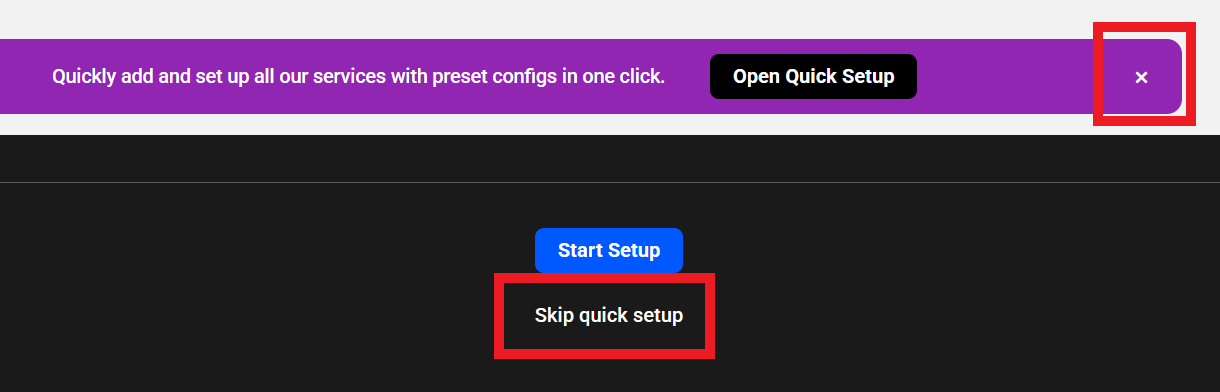
If you had previously dismissed the Quick Setup and wish to get it back again, click the kebab icon at top-right to open the site options, and select Settings. Then click the Reset link for the Reset quick setup option.

4.4 Get Support
Copy chapter anchor to clipboardIf you still have questions or need assistance after reading this document, please don’t hesitate to contact our support superheroes using the available options under the Support tab in your Hub or via the Support tab in your WPMU DEV Dashboard.