7. Security Center

The Security Center is where you can activate and manage robust IP protection for any or all of your WPMU DEV dedicated sites and unlimited servers, as well as 3rd-party sites. You’ll find two distinct services available here; see the corresponding chapters below for details.
- AntiBot Global Firewall – Proactively protect your sites & servers against potential threats by instantly blocking over 250,000 known malicious IPs.
- Custom IP List – Create and manage your own custom lists to allow and/or block IP addresses, and automatically sync them with any of your sites & servers.
7.1 AntiBot Global Firewall
Copy chapter anchor to clipboardThe AntiBot Global Firewall enables you to synchronize an automatically-updated IP blocklist with any or all of your sites. The feature actively monitors millions of IP addresses and intelligently updates its blocklist data twice daily to ensure your sites are protected by the most robust firewall available.

This service works out of the box with WPMU DEV hosted sites & servers. However, 3rd-party hosted sites where you wish to enable the service must be connected to your Hub, with the Defender plugin (version 5.3 or greater) active on them.
Click the Protect your sites now button to get started. Or click the View AntiBot in Action button to see current statistics about the feature; see AntiBot Stats below for more information.
Once activated, the screen will refresh and will display some cumulative data in the AntiBot in Action section. Click View Daily Stats to get detailed statistics.
- Blocked IPs – Basic Mode – The total number of IPs blocked by AntiBot Basic mode.
- Blocked IPs – Strict Mode – The total number of IPs blocked by Strict mode
- Suspicious IPs – The number of IP addresses currently being monitored for suspicious activity.

7.1.1 Add to Sites
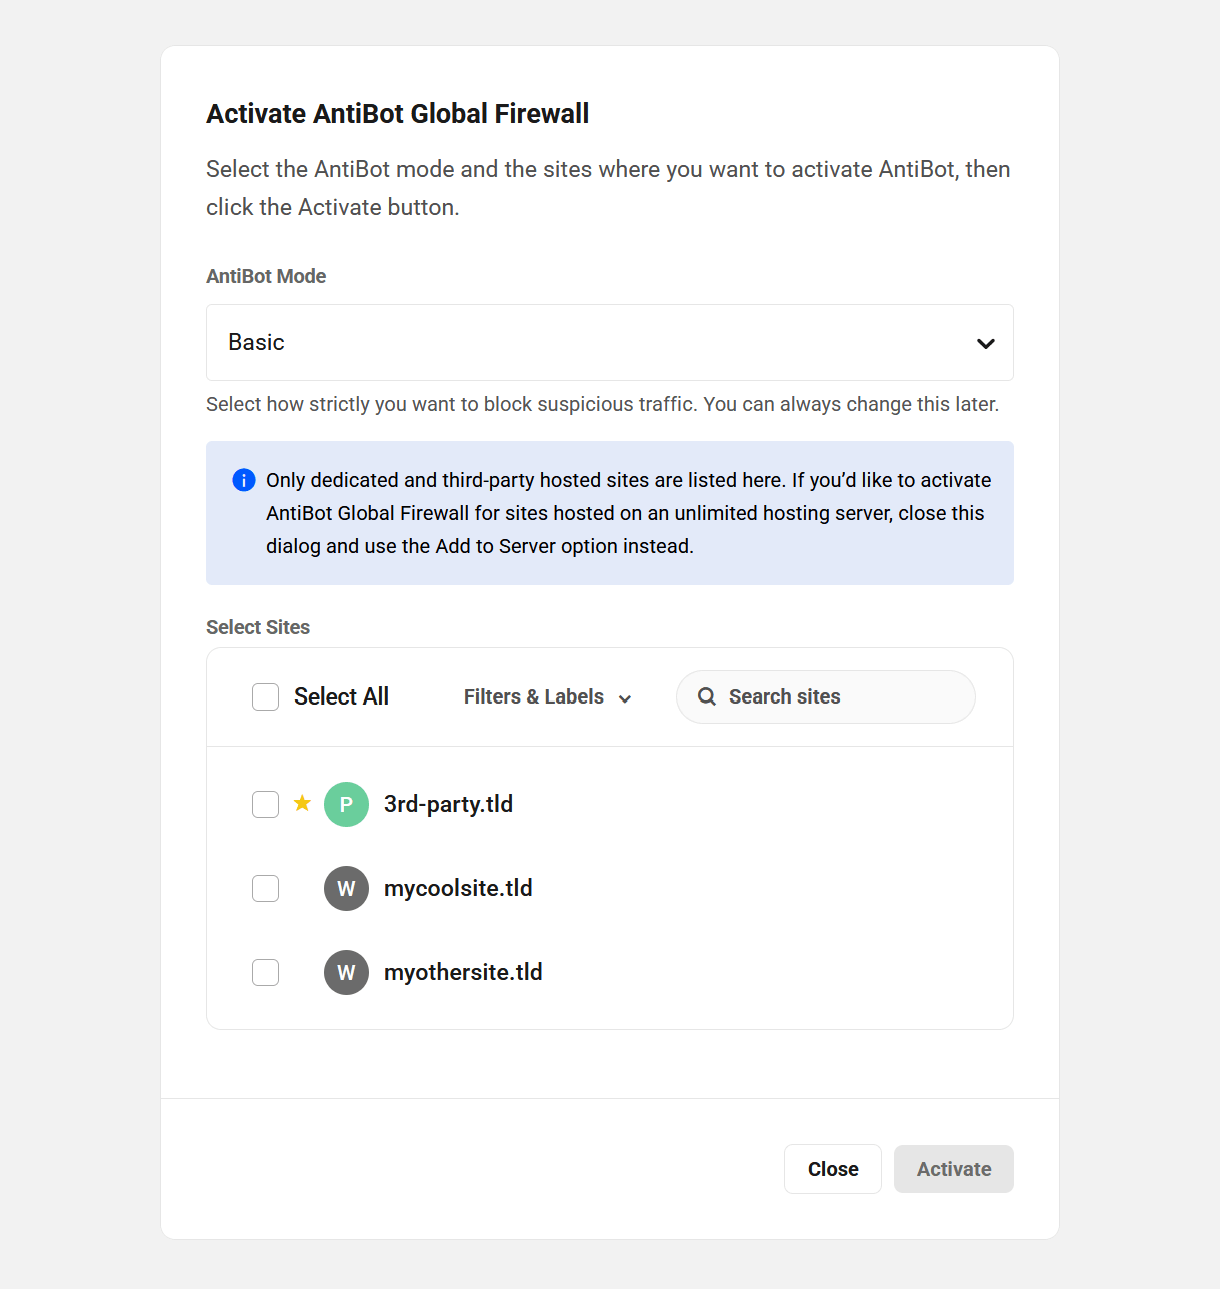
Link to chapter 1Click the Add to Sites button to pop open a modal window where you can select the AntiBot Mode that you wish to be applied on selected WPMU DEV dedicated or 3rd-party hosted sites.
- Basic – This is the default mode and it allows safe bots and tools like uptime monitors or SEO scanners to access your site, and it skips blocking visitors with minor issues like 404 errors.
- Strict – This mode blocks all suspicious activity, including visits with broken links.
Then check the Select all box or select just the specific sites you want.
Filters & Labels
If you have a large number of sites, you can filter the list to display only those you need. Click Filters & Labels and select to display sites according to Hosting, Favorites, custom Labels or currently active AntiBot Mode. Click the Activate button when you’re done.
Note that the filters & labels here work just as they do on your My Sites screen to filter your sites. See Filters & Labels below for details.

7.1.2 Manage Sites
Link to chapter 1Once you’ve activated the service on at least one site, a Manage button will appear. Click it to view all sites where AntiBot is active, and optionally switch modes or deactivate the service on selected sites.
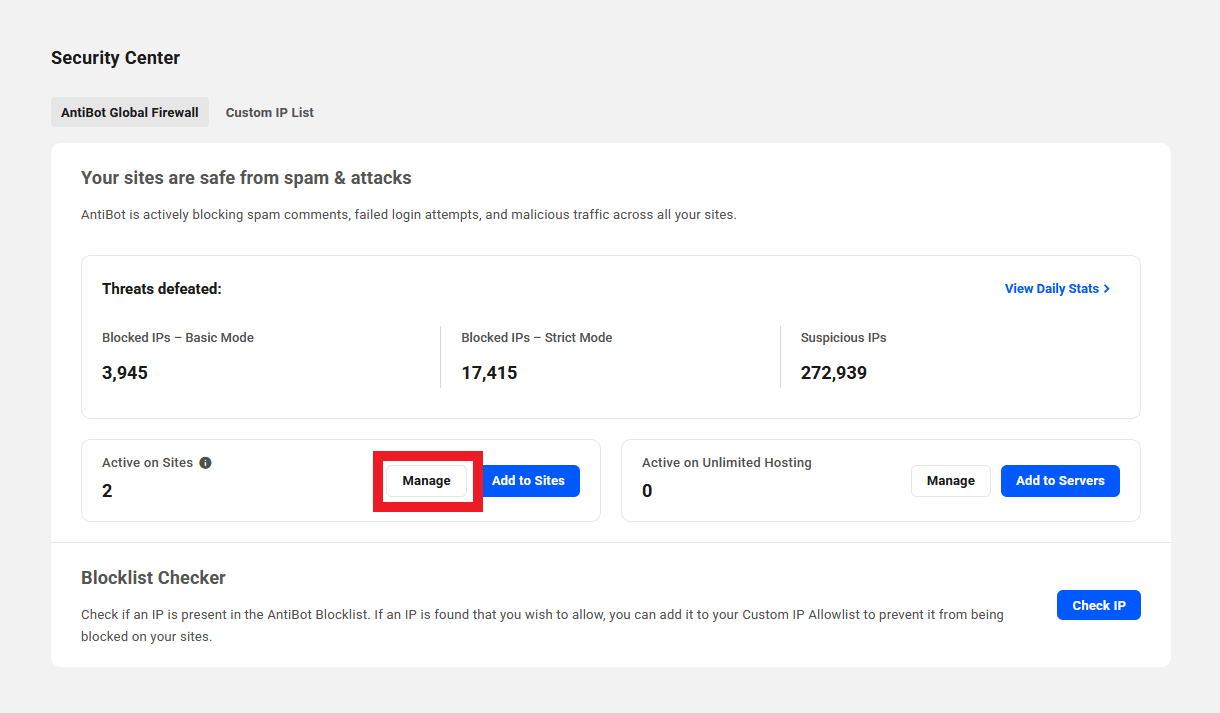
That will pop open a modal window where you can check the Select all box or just select the specific sites you want. As above, you can filter the list to display only those sites you need. Then click the Apply Action button to select the action to apply to all selected sites.

7.1.3 Add to Servers
Link to chapter 1Click the Add to Servers button to pop open a modal window where you can select the AntiBot Mode that you wish to be applied on selected WPMU DEV unlimited hosting servers. Note that when active on an unlimited hosting server, AntiBot protects all sites on that same server; there is no option to enable or disable it per site on unlimited servers.
- Basic – This is the default mode and it allows safe bots and tools like uptime monitors or SEO scanners to access your site, and it skips blocking visitors with minor issues like 404 errors.
- Strict – This mode blocks all suspicious activity, including visits with broken links.
Then check the Select all box or select just the specific servers you want. There are no filtering options in this modal.

7.1.4 Manage Servers
Link to chapter 1Once you’ve activated the service on at least one server, a Manage button will appear. Click it to view all servers where AntiBot is active, and optionally switch modes or deactivate the service on selected servers.
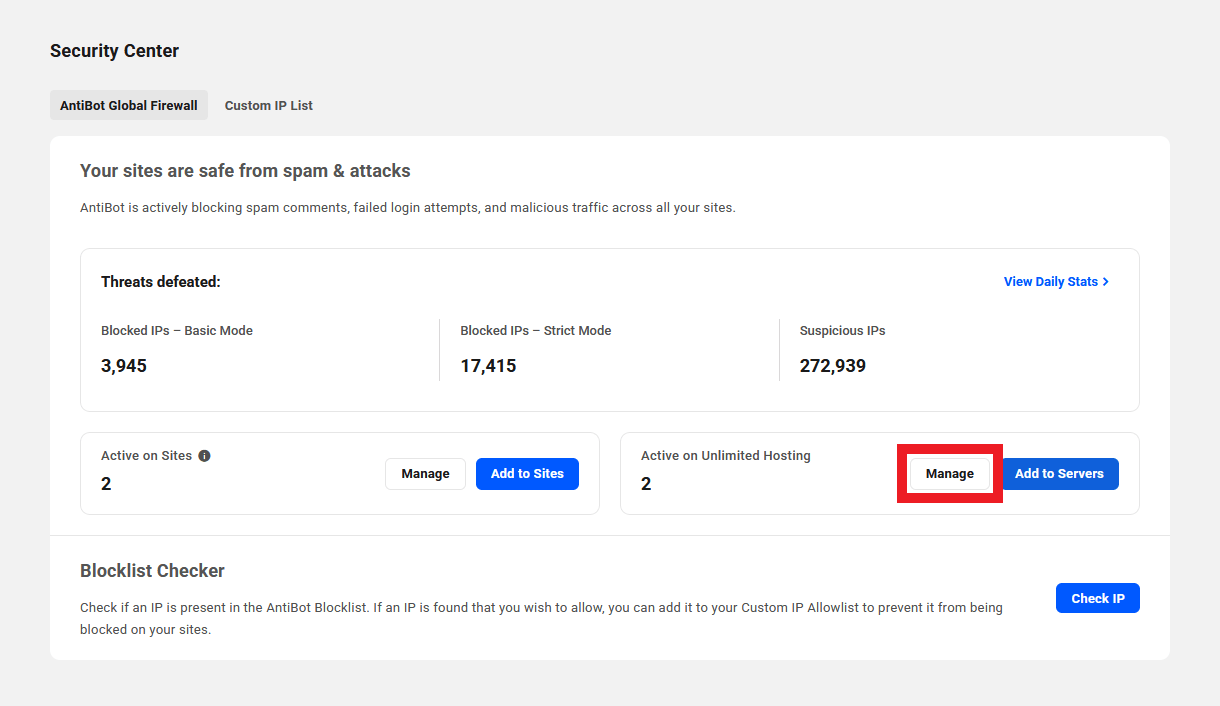
That will pop open a modal window where you can check the Select all box or just select the specific servers you want. Note that there is no option to filter servers here.

7.1.5 AntiBot Stats
Link to chapter 1Click the View AntiBot in Action button on the welcome screen, or the View Daily Stats link that appears in the AntiBot in Action section once activated on at least one site. That will pop open a modal window where you can view detailed statistics, categorized as follows:
- Suspicious IPs – IPs we’re keeping an eye on due to unusual behavior patterns.
- Blocked IPs – A running total of all the harmful IPs we’ve added to the blocklist.
- IPs Sneaking Around Your Non-Existent Pages (404) – IPs caught accessing non-existent pages (404s), which means they were probably probing or scanning sites.
- IPs Triggering Failed Login Attempts – IPs responsible for failed login attempts across the AntiBot network.
- IPs Flagged for Spam Comments – IPs that have been caught posting spam comments across the AntiBot network.
- IPs Attempting Unauthorized Auth – IPs that have repeatedly attempted to access areas protected by HTTP authentication.
- IPs Flagged by Web Application Firewall – IPs with suspicious behavior that have been blocked by server-level Web Application Firewall rules.
- IPs Trying Suspicious SSH Access – IPs attempting to use brute-force attacks to connect to your server via SSH.
- IPs Caught Exploiting XML-RPC Endpoint – IPs accessing the WordPress XML-RPC endpoint, a common target in DDoS or brute-force attacks.
- IPs Recognized as Potentially Harmful Traffic Sources – IPs that attempted actions which could pose a risk to online services, based on automated traffic analysis.
- IPs Associated with Suspicious Website Requests – IPs of requests that matched patterns commonly associated with misuse or automated abuse, identified through routine review of website traffic.
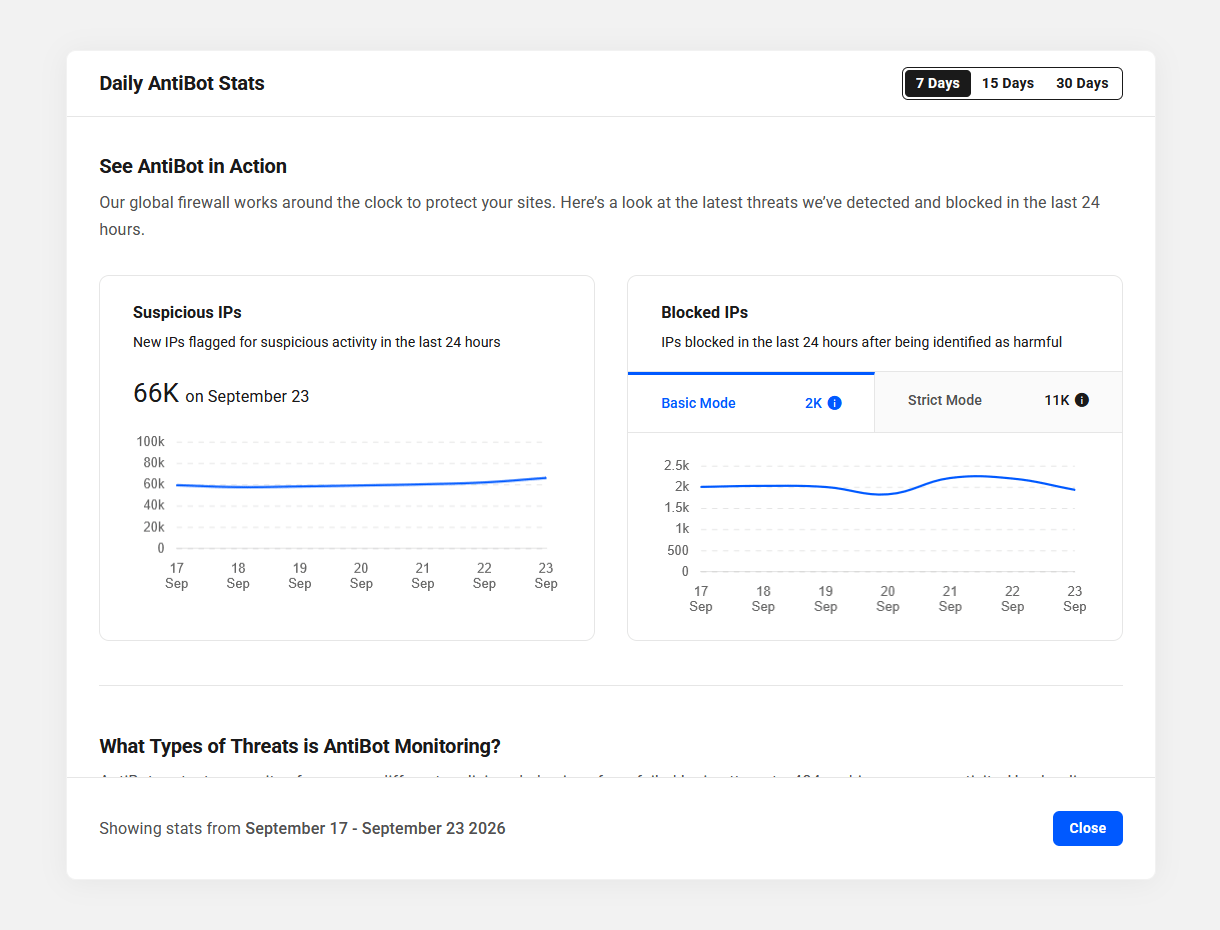
Note that only the first two categories of statistics are immediately viewable, but you can scroll through the list to view all categories.
Use the date range toggle at top-right to view stats for the last 7, 15 or 30 days.
7.1.6 Blocklist Checker
Link to chapter 1If you ever have the need to allow an IP address that might be on the AntiBot blocklist, first click the Check IP button in the Blocklist Checker section of the main AntiBot screen.

That will pop open a modal window where you’ll enter the IP address you wish to check, and click the Search button.

If the IP is on the blocklist, you’ll see a confirmation message with options to Report as a Trusted IP or to Add to Your Custom Allowlist if you want to allow that IP to access sites where you have synced that list.

Selecting Add to Custom Allowlist will prompt you to confirm the action.

If the IP is not on the AntiBot blocklist, the tool will inform you of that as well.

7.2 Custom IP List
Copy chapter anchor to clipboardThe Custom IP List is where you can create and manage your own custom lists to allow and block IP addresses, and automatically sync those lists with any or all of your sites (both dedicated hosting and 3rd-party) as well as your unlimited hosting servers.
Once synced with a site or server, you can also view your Custom IP Lists in a synced site’s wp-admin at Defender > Firewall > Local Blocklist. You can sync the lists from there as well at any time.

Both the allowlist and blocklist accept IPv4 and IPv6. IP ranges are also accepted, in either CIDR or hyphenated format.
Add the IPs you want to allow or block to the corresponding list, one address or range per line, and click the Save button for each list.
7.2.1 Add to Sites
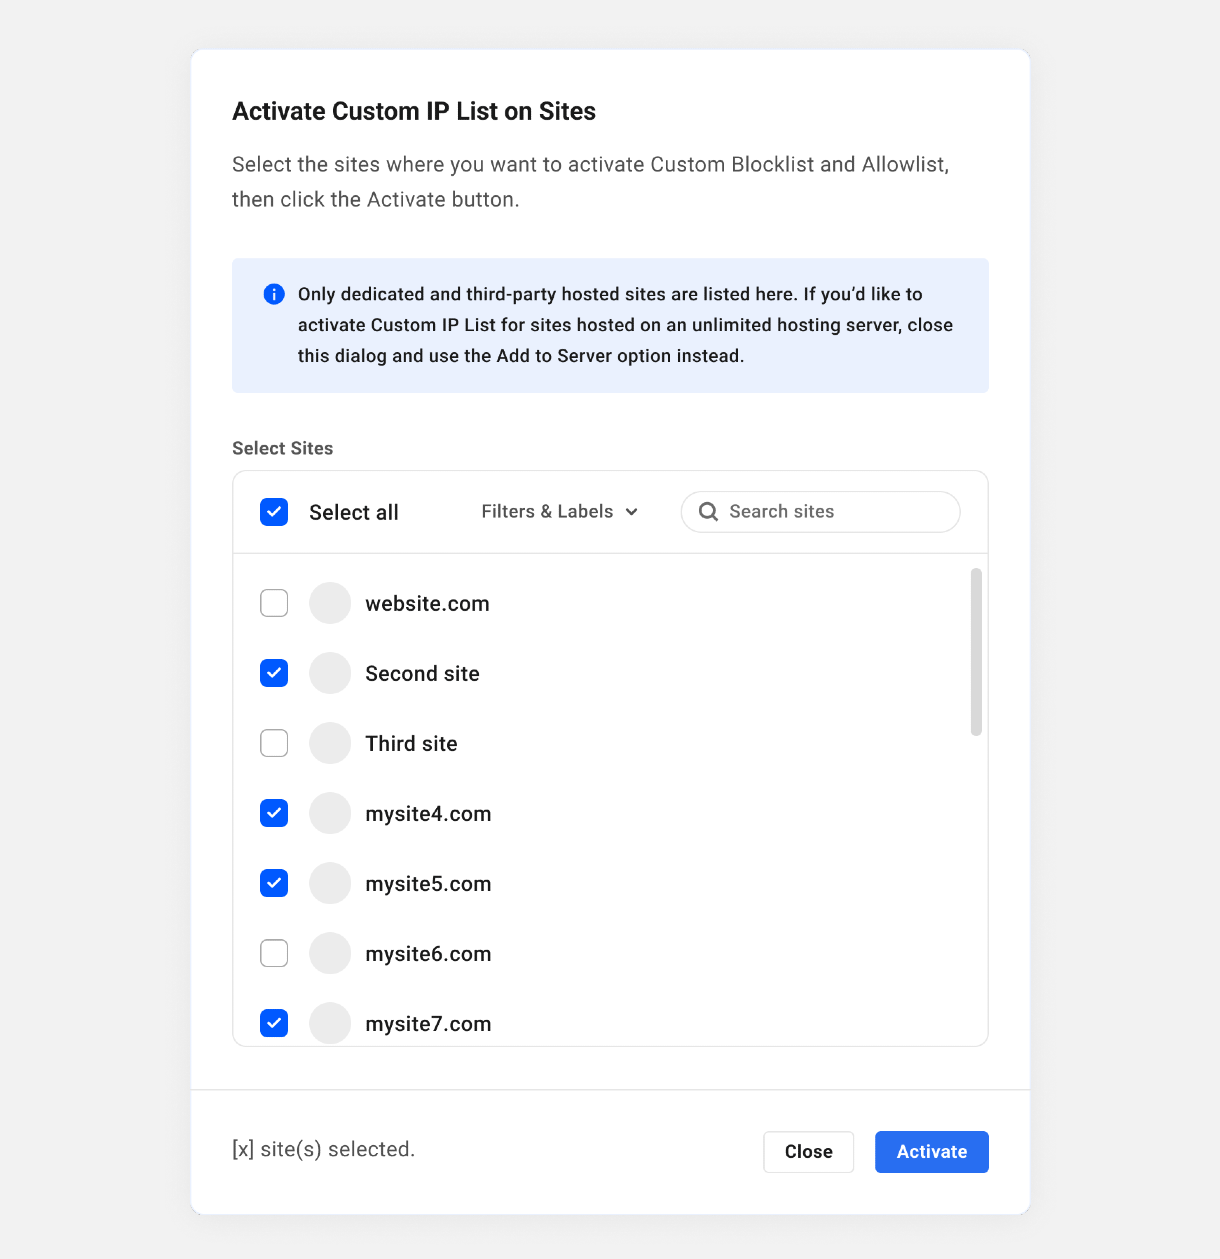
Link to chapter 2Click the Add to Sites button to pop open a modal window where you can select the WPMU DEV dedicated hosting or 3rd-party sites where you wish to activate the feature. Check the Select all box or select only the specific sites you want.
Just like with the AntiBot site filters, you can filter the list of sites here to display only those you want by clicking the Filters & Labels dropdown.
7.2.2 Add to Servers
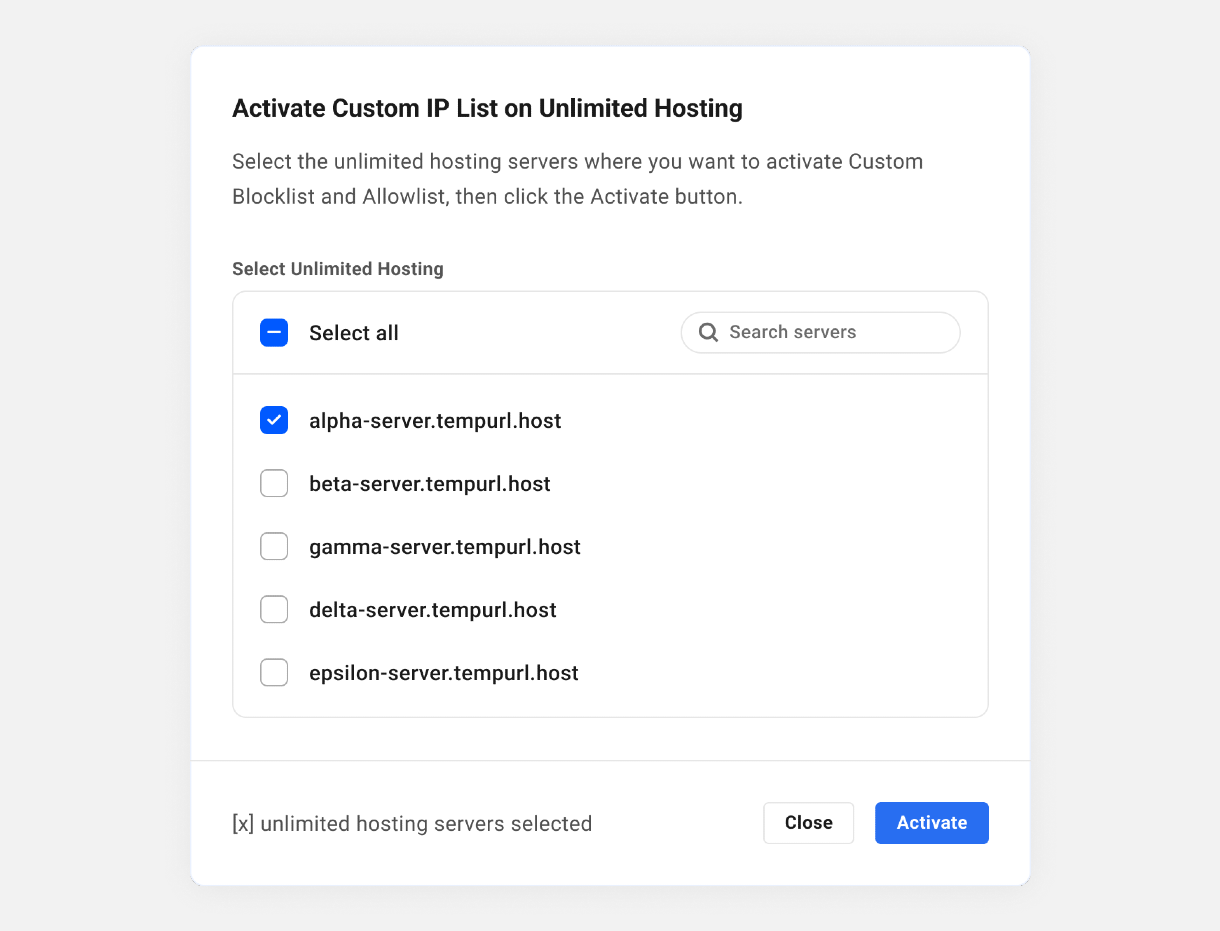
Link to chapter 2Click the Add to Servers button to pop open a modal window where you can select the WPMU DEV unlimited hosting servers where you wish to activate the feature. This enables the Custom IP List feature on all sites on the selected server(s).
Check the Select all box or select only the specific servers you want. Note that there are no filtering options for unlimited hosting servers.
7.2.3 Activating on a Single Site
Link to chapter 2Dedicated or 3rd-party Hosted Site
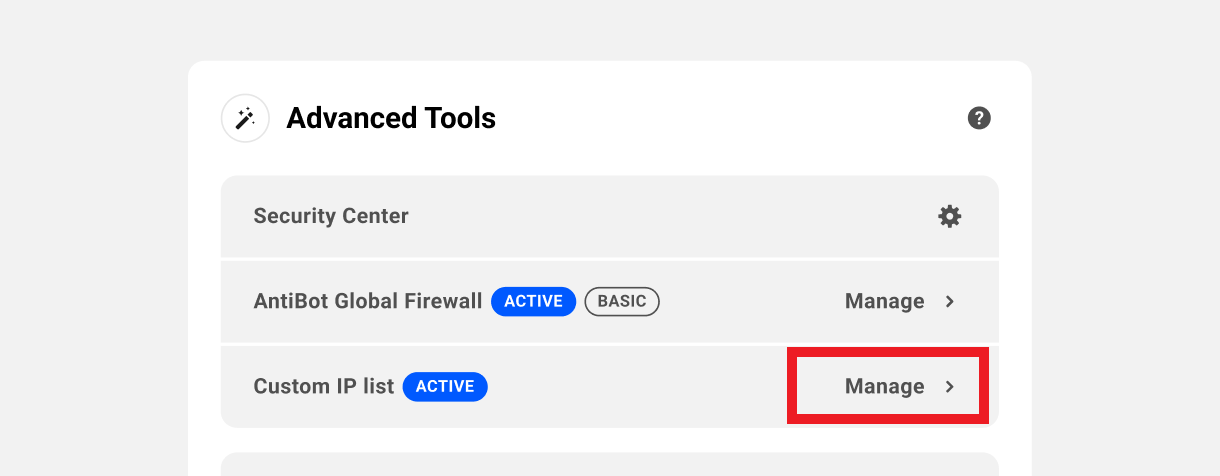
To activate the Custom IP List on a single dedicated hosting or 3rd-party site, navigate to the site’s Security tab in your Hub, and locate the Advanced Tools widget on that screen.
In that widget, toggle on the Custom IP List option. Your site is now synced with your custom allow & block lists.

Site on an Unlimited Hosting Server
To activate the Custom IP List on a site hosted on an unlimited hosting server, navigate to the site’s Security tab in your Hub, and locate the Advanced Tools widget on that screen.
If the service is not yet active on the server the site is hosted on, clicking the Off link will direct you to the server’s Tools screen where you can activate it for the server hosting that site. That will effectively activate the service on all sites on that same server.
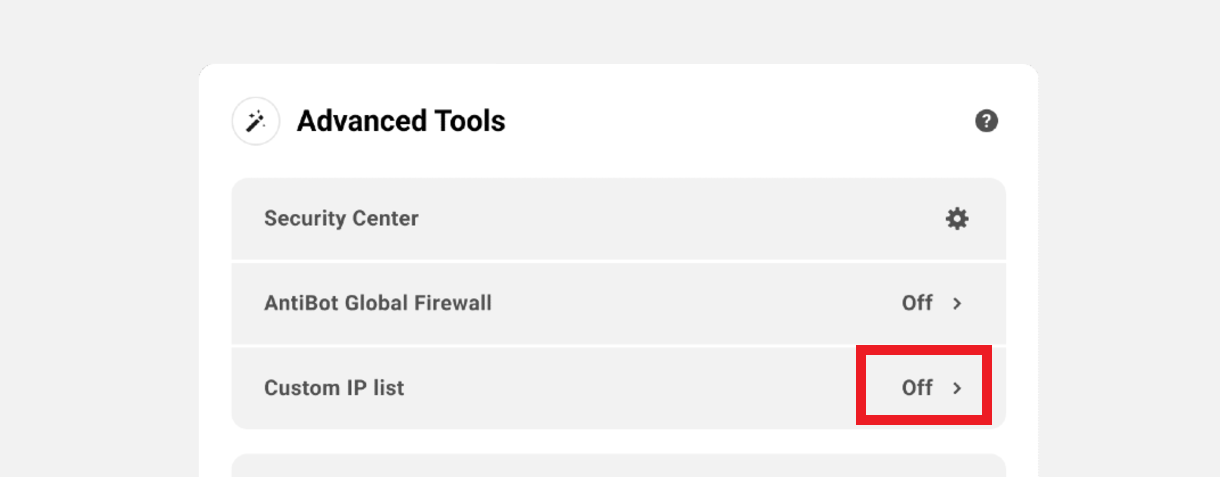
If the service is already active on the server the site is hosted on, a Manage link will appear instead that will also direct you to the server’s Tools screen where you can manage it for all sites on that same server.
7.2.4 Manually Syncing Your Lists
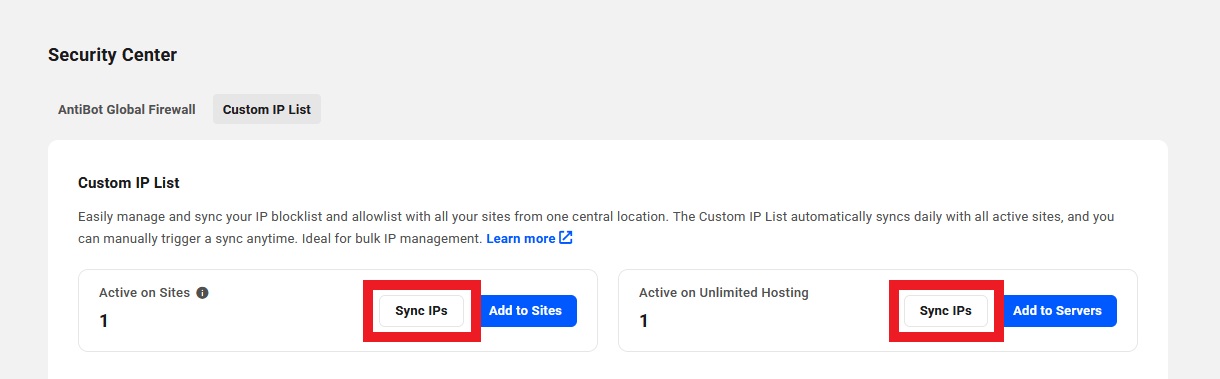
Link to chapter 2The Custom IP List automatically syncs daily with all active sites. But you can click the Sync IPs buttons that appear once you have activated the service on at least one site and/or server. That will instantly sync your lists with all sites and/or servers.
7.2.5 Allowlist and Blocklist Logic
Link to chapter 2If you also have local IP allow/blocklists set up in Defender, this is the logic that will be followed once your Custom IP Allow/Blocklists have been synced with your site:
- If an IP address is in either the Local IP Blocklist in Defender on your site, or the Custom IP Blocklist in your Hub, but not in either Allowlist, that IP will be blocked from accessing your site.
- If an IP address is in your local Allowlist, it will be allowed to access your site even if that same IP is in the Local and/or Custom Blocklists.
- If an IP address is present in your Custom Allowlist, it will be allowed to access your site even if that same IP is in any of the other lists
This table shows all the possible combinations where an IP address is either present or not in each list, and the result; either allowed or blocked. A “0” indicates the IP is not in the list, and a “1” indicates the IP is in that list.
| Custom Allowlist | Local Allowlist | Custom Blocklist | Local Blocklist | Result |
|---|---|---|---|---|
| 0 | 0 | 0 | 0 | Allowed |
| 0 | 0 | 0 | 1 | Blocked |
| 0 | 0 | 1 | 0 | Blocked |
| 0 | 0 | 1 | 1 | Blocked |
| 0 | 1 | 0 | 0 | Allowed |
| 0 | 0 | 0 | 0 | Allowed |
| 0 | 1 | 0 | 1 | Allowed |
| 0 | 1 | 1 | 0 | Allowed |
| 0 | 1 | 1 | 1 | Allowed |
| 1 | 0 | 0 | 0 | Allowed |
| 1 | 0 | 1 | 0 | Allowed |
| 1 | 0 | 1 | 1 | Allowed |
| 1 | 1 | 0 | 0 | Allowed |
| 1 | 1 | 0 | 1 | Allowed |
| 1 | 1 | 1 | 0 | Allowed |
| 1 | 1 | 1 | 1 | Allowed |
7.3 Get Support
Copy chapter anchor to clipboardIf you still have questions or need assistance after reading this document, please don’t hesitate to contact our support superheroes using the available options under the Support tab in your Hub or via the Support tab in your WPMU DEV Dashboard.