7. WPMU DEV IP Addresses

If you are having difficulty with a WPMU DEV service not working properly for you, it may be that one or more of our IP addresses are being blocked by a firewall at your host, or a firewall feature in a security plugin you may have installed.
To fix that, you can add our IP addresses to an allowed list in your security plugin or your host’s firewall to allow the connection between your server and ours to proceed unimpeded.
Following are the IP addresses we use for all our services. We recommend adding all of them to your allowed list, but you can of course only add those you need.
WPMU DEV site
18.204.159.253
54.227.51.40
3.93.131.0
WPMU DEV Hosting API
18.219.56.14
SmartCrawl
45.55.78.242
35.171.56.101
Defender (Patchstack Vulnerability Database)
18.219.161.157
Uptime
34.196.51.17
35.157.144.199
WP-Smush
165.227.251.117
165.227.251.120
140.82.60.49
45.63.10.140
45.55.99.225
129.212.147.22
Snapshot 4
35.157.144.199
34.196.51.17
18.204.159.253
54.227.51.40
3.93.131.0
Broken Link Checker API
165.227.127.103
64.176.196.23
144.202.86.106
Hummingbird Critical CSS feature
167.71.93.101
167.71.179.192
If you want to add all of the above IP addresses in one go, here’s the full list with no headings so you can just copy/paste it to your allowed list:
7.1 Allow List Guides
Copy chapter anchor to clipboardThis chapter provides guidance on adding WPMU DEV’s IP addresses to the allow list in popular security plugins and firewalls.
7.1.1 Cloudflare
Link to chapter 1If you have Bot Fight Mode enabled in your Cloudflare account, it’s important to know that custom rules might not bypass that feature and some needed requests could be blocked. In that case, you’d want to create individual custom rules that allow the specific IPs or user agents being blocked, or upgrade to Super Bot Fight Mode.
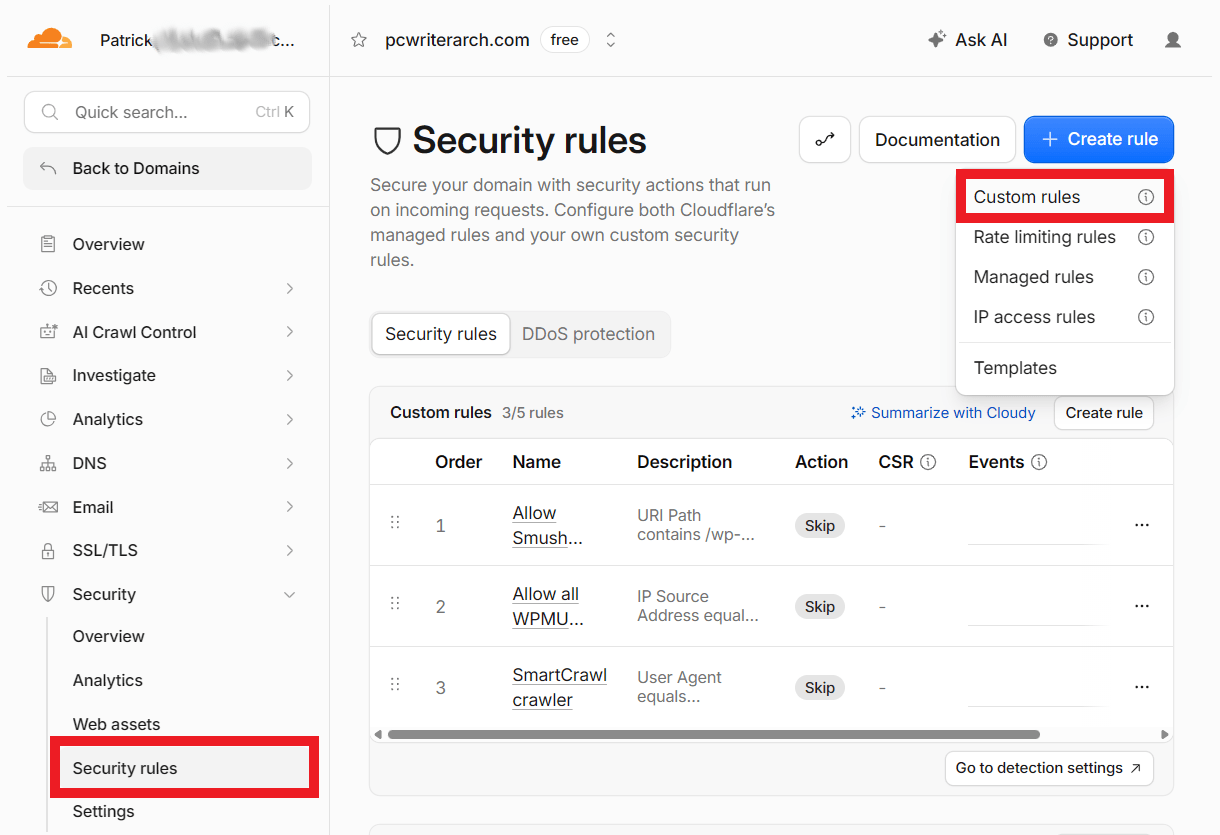
On Cloudflare’s dashboard, go to Security > Security rules, click the + Create rule button and select Custom rules.
Give your rule any name you like. Then click Edit Expression
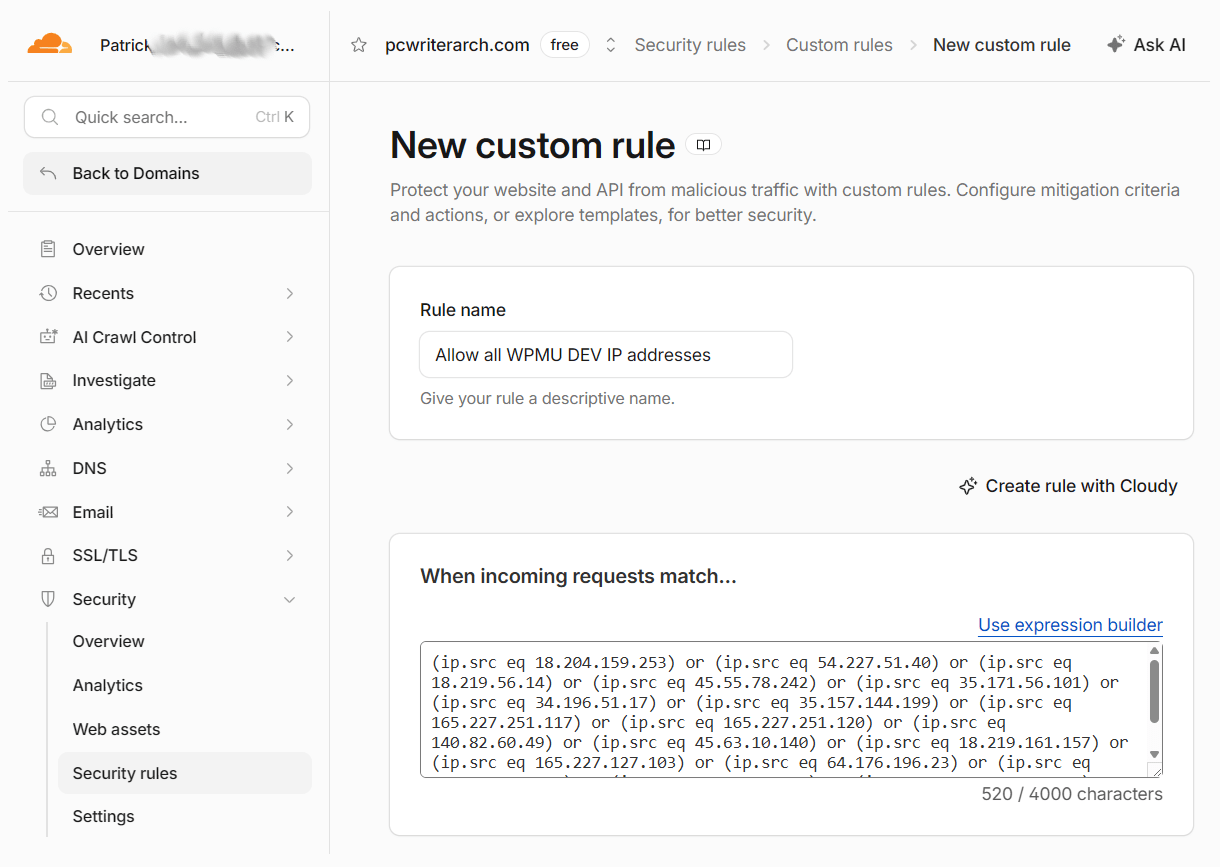
Paste the following code into the textarea.
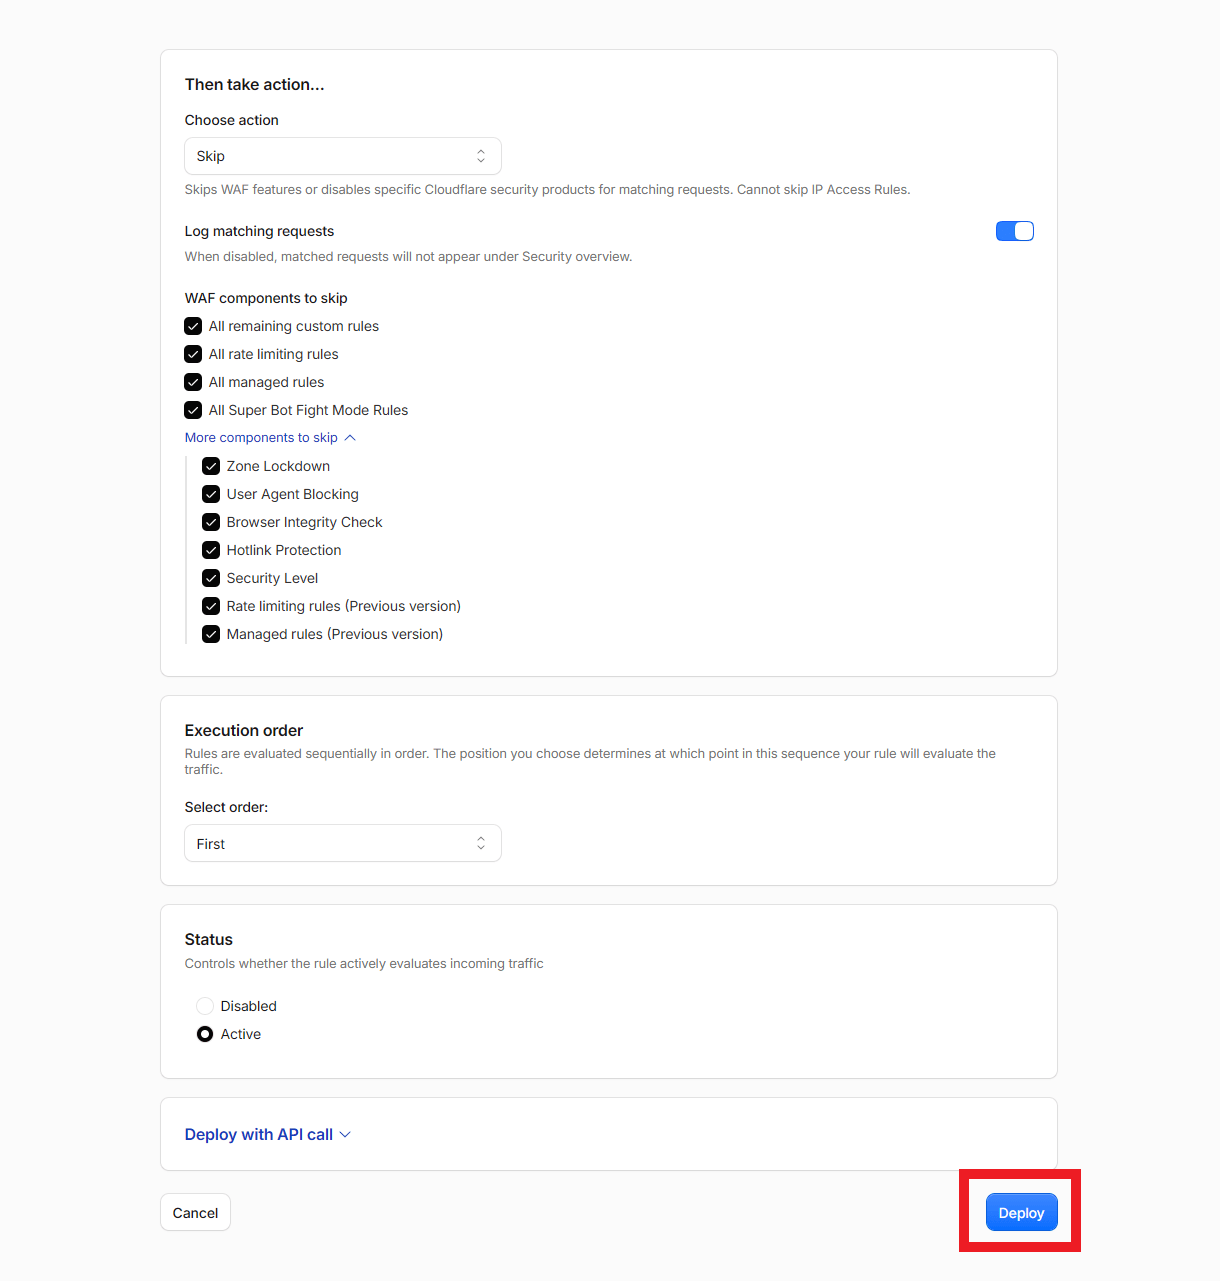
Next, select Skip as the Action, and enable all components including those under the More toggle. Finally, set the Execution order to First, set the Status to Active, and click the Deploy button to save the rule.
7.1.2 WordFence
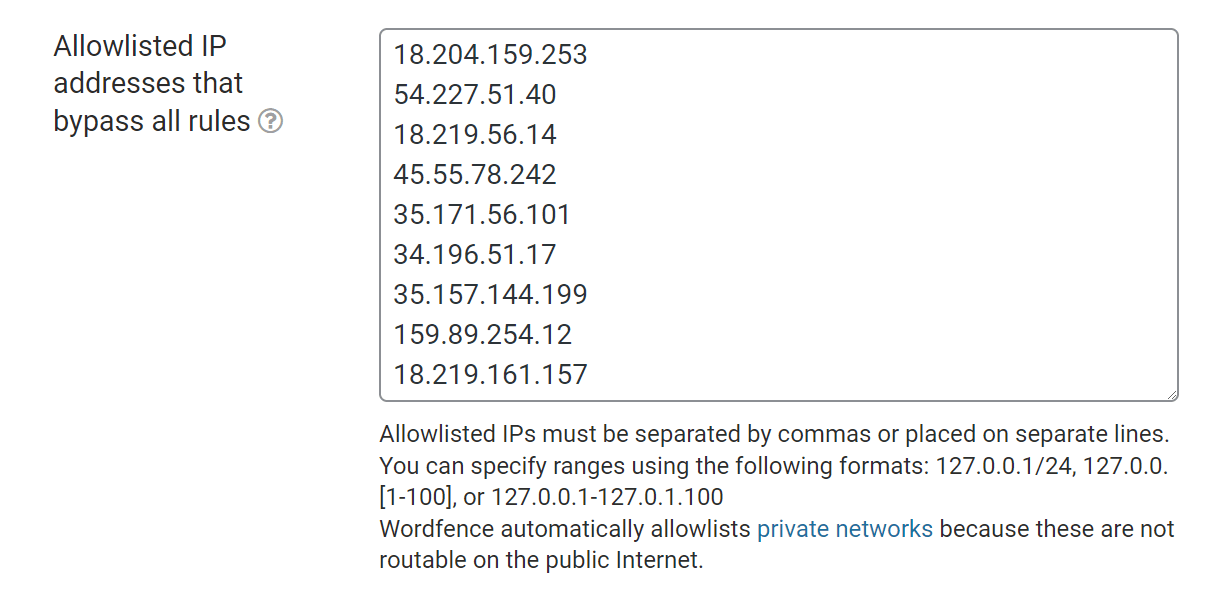
Link to chapter 1In your WordPress Dashboard, go to Wordfence > All Options. Under the Firewall Options section, click on the Advanced Firewall Options to reveal the settings. Add WPMU DEV’s IP addresses to the Allowlisted IP addresses that bypass all rules field then click the Save Changes button.
7.2 Get Support
Copy chapter anchor to clipboardIf you still have questions or need assistance after reading this document, please don’t hesitate to contact our support superheroes using the available options under the Support tab in your Hub or via the Support tab in your WPMU DEV Dashboard.